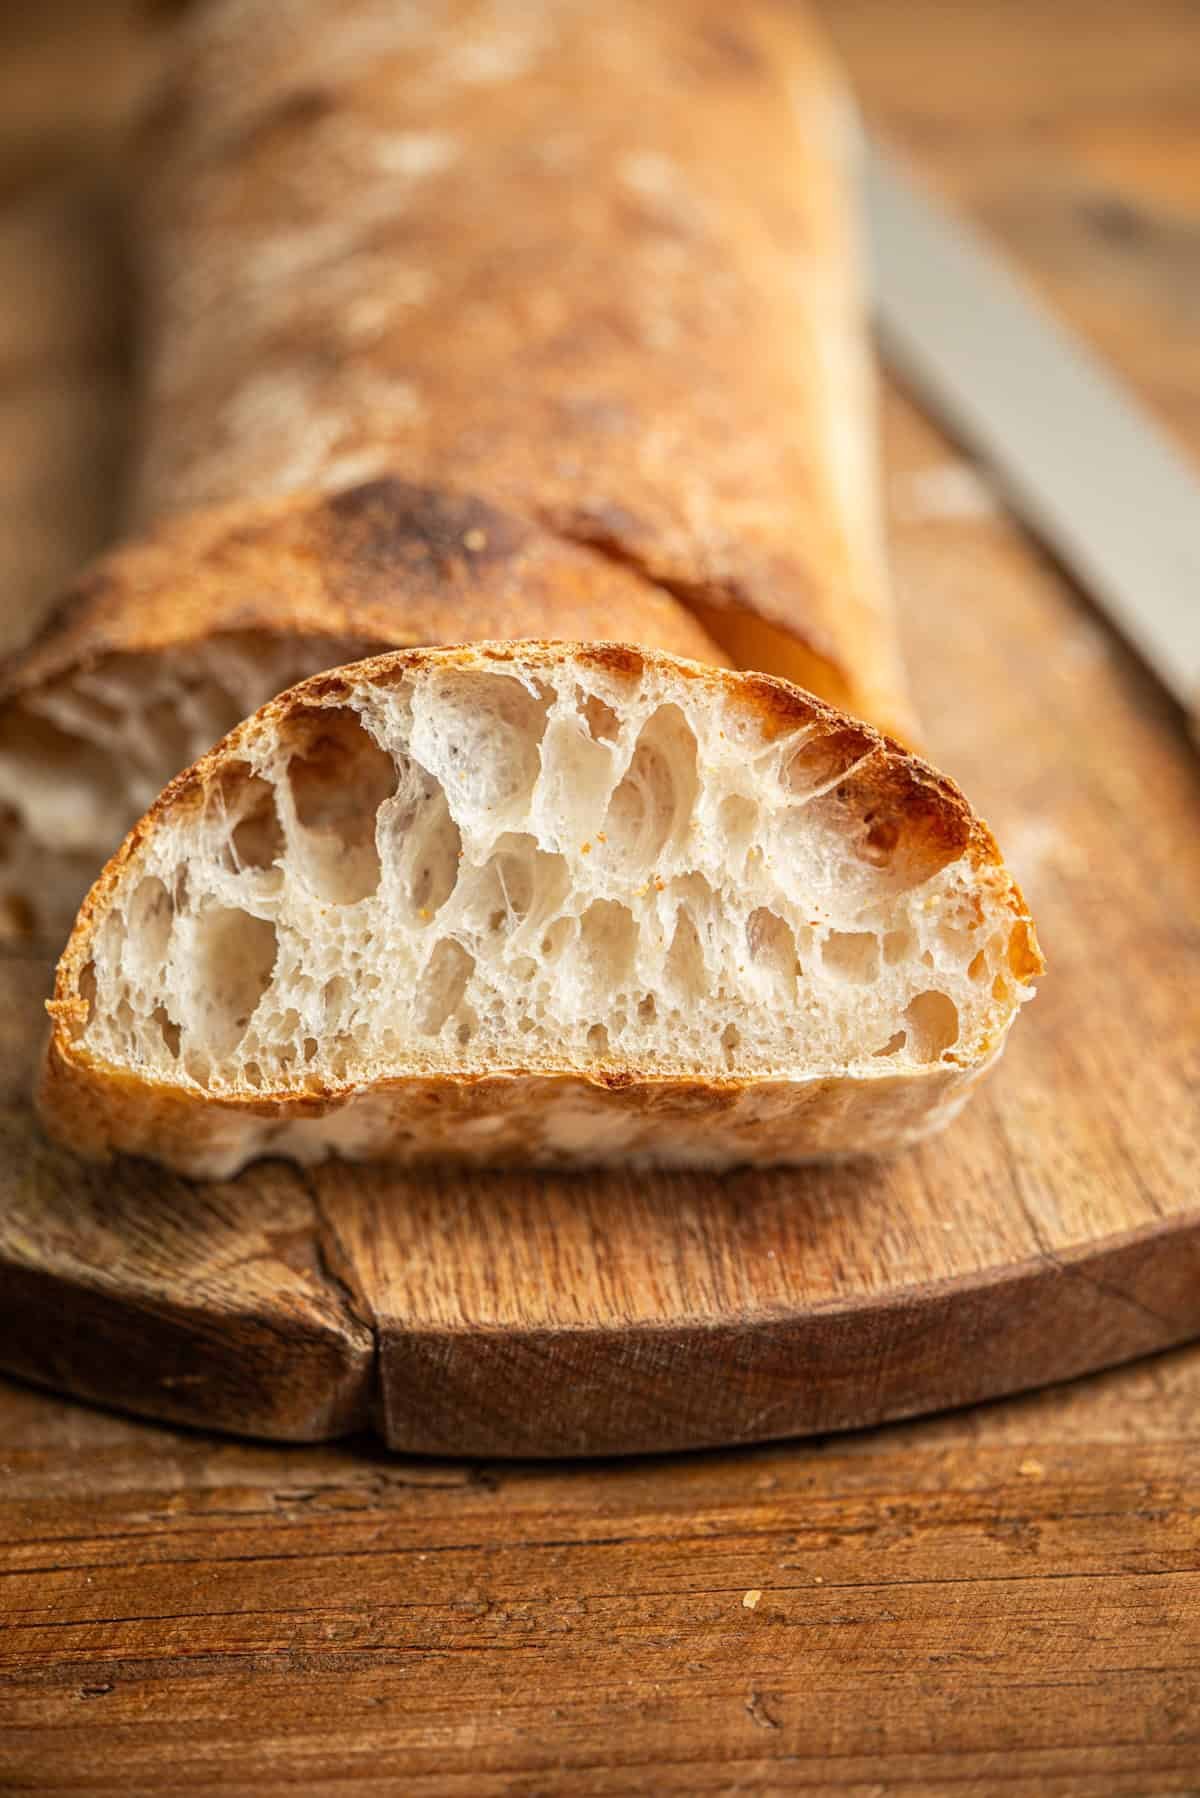
Sourdough ciabatta is one of the most rewarding Italian breads you can ever learn to bake right in your own home kitchen. This amazing rustic loaf is famous around the world for its thin crispy outer crust, its delightful golden color, and its famous big open air pockets inside the soft middle crumb. While classic white bread is often heavy and dense, a proper homemade ciabatta feels surprisingly light as air when you pick it up because it is packed with high hydration and natural yeast bubbles. Baking this specific recipe brings the magical experience of a traditional neighborhood bakery directly to your counter without needing fancy commercial machines or expensive equipment. You only need standard basic kitchen staples like white bread flour, clean fresh water, fine sea salt, and a active bubbly sourdough starter that you have fed with care. The real beauty of this bread lies in its natural simplicity because you let patience and time do all the hard work for you instead of tiring out your arms with heavy physical kneading.
People absolutely love baking and eating sourdough ciabatta because it delivers a wonderful sensory experience that simple store bought bread can never match. The incredible sound of the crispy golden crust crackling under your knife as you slice through a freshly baked loaf is pure music to any real food lover. Inside you discover a soft pillow of tender dough filled with large beautiful holes that are perfect for catching pools of rich olive oil, melted cheese, or savory pasta sauces. Unlike fast factory made commercial breads that rely on chemical additives and commercial dry yeast, naturally fermented sourdough offers a rich complex flavor that is gently tangy, savory, and deep. Every single bite gives you an enjoyable contrast between the deep crunch of the outer crust and the super soft chew of the center crumb. Baking this bread at home gives you a huge sense of personal pride because transforming simple flour and water into a stunning piece of artisanal food feels like real kitchen magic.
There are so many fantastic reasons and special occasions to bake a warm fresh batch of sourdough ciabatta for yourself, your family, or your friends. If you care deeply about your personal wellness and digestive health, natural sourdough fermentation is a huge win for your daily diet because it naturally breaks down gluten proteins and phytic acid over long resting hours. This long slow digestion process makes the finished bread much easier on your sensitive stomach and allows your body to absorb minerals far better than standard fast rising white loaves. Emotionally, taking the time to gently stretch, fold, and shape wet bread dough acts as a calming stress reliever that helps you slow down and relax after a busy stressful work week. It is also the ultimate bread to bake when you are host to a fun casual weekend dinner party or a lively outdoor summer barbecue with loved ones. Slicing a huge airy ciabatta open to build giant stacked gourmet sandwiches, crispy paninis, or garlic rubbed bruschetta instantly upgrades any simple lunch into a memorable feast.
Mastering this recipe will change the way you think about baking forever because it teaches you how to work naturally with high hydration dough using simple gentle hand techniques. Many beginner bakers feel intimidated when they see wet loose dough, but this clear guide takes away all the stress and confusion so you can succeed on your very first try. The natural sourdough process uses beneficial wild yeasts and good bacteria that work together to create incredible gas pockets that lift the heavy dough effortlessly during baking. As the loaf bakes in a hot oven, the high moisture turns into strong trapped steam, pushing the elastic gluten walls outward to create those classic large open holes everybody wants to see. Once you taste a fresh piece of homemade ciabatta dipped in extra virgin olive oil and freshly ground black pepper, you will never want to buy cheap mass produced bread from the supermarket ever again. This timeless baking process brings deep satisfaction, nourishing comfort, and unbelievable flavor into your everyday routine.
Ingredients You Will Need
-
Bread Flour with high protein content: 400 grams
-
Warm Clean Water (about 25 degrees Celsius): 330 grams
-
Active Sourdough Starter (fully fed and bubbly): 80 grams
-
Fine Sea Salt: 8 grams
-
Extra Virgin Olive Oil (for oiling your hands and proofing bowl): 15 grams
Step by Step Method
Step 1: Feeding Your Sourdough Starter
Make sure your sourdough starter is active, healthy, and extremely bubbly before you start mixing your main dough. Feed your starter about four to six hours before you plan to bake so it doubles or triples in size inside its jar. You can test if it is ready by dropping a small spoonful into a glass of cool water. If the starter floats gently on top of the water, it is full of gas and ready to bake your ciabatta.
Step 2: Mixing the Initial Dough
In a large clean glass or plastic mixing bowl, pour in 320 grams of your warm water along with 80 grams of active starter. Stir the liquid gently with a wooden spoon or your clean fingers until the starter dissolves completely into a milky white liquid. Add 400 grams of bread flour to the bowl and stir until all the dry flour disappears into a messy shaggy dough. Cover the bowl with a damp towel and let it rest undisturbed for 40 minutes so the flour absorbs the liquid naturally.
Step 3: Adding Salt and Extra Water
After the rest period ends, sprinkle 8 grams of fine sea salt across the top of your wet dough. Pour the remaining 10 grams of warm water directly over the salt to help it dissolve smoothly into the mixture. Wet your hands with clean cold water so the dough does not stick to your skin. Gently squeeze and fold the dough between your fingers for about three minutes until the salt is fully incorporated and the dough starts to feel a little smoother and tighter.
Step 4: Performing Coil Folds for Strength
High hydration ciabatta dough needs gentle folds instead of heavy traditional kneading to build strong gluten walls. You will perform four sets of coil folds spaced thirty minutes apart over the next two hours. To do a coil fold, wet both of your hands, reach under the middle of the dough from both sides, lift the dough up gently until it releases from the bottom of the bowl, and let the loose ends curl neatly underneath itself. Rotate the bowl ninety degrees and repeat this action. Cover the bowl and let it rest for thirty minutes between each set. You will notice the dough becoming smoother, stronger, and more shiny after every set.
Step 5: The Long Bulk Fermentation
Once you complete all four sets of coil folds, cover the bowl tightly with plastic wrap or a secure lid. Leave the dough sitting at warm room temperature for about three to four hours. During this period, the wild natural yeast will consume the natural sugars in the flour, producing lots of carbon dioxide gas bubbles. The dough is ready for the next phase when it has expanded by about fifty percent in volume, looks dome shaped on top, and shows small visible air bubbles underneath the surface.
Step 6: Shaping the Ciabatta Loaves
Generously dust a clean work surface with a thick layer of bread flour or fine semolina flour. Gently tip the mixing bowl upside down over the floured surface and allow the wet puffy dough to slide out naturally without pulling or popping the delicate air bubbles inside. Dust the top of the flat dough with more flour. Using a bench scraper or a sharp knife, carefully divide the dough straight down the middle into two equal rectangular loaves. Use your flour dusted hands to gently tuck the loose edges underneath each piece to form neat long shapes without pressing out the trapped air.
Step 7: The Final Proof on a Baker Cloth
Prepare a thick linen baker cloth or a clean kitchen towel by dusting it heavily with flour so the wet dough will not stick. Carefully transfer your two shaped rectangular loaves onto the floured cloth using your hands and bench scraper. Pull folds of the towel upward between the two loaves to create supportive cloth walls that keep the wet ciabatta pieces from spreading sideways as they take their final rest. Cover the loaves loosely with another light towel and let them rise at room temperature for forty five to sixty minutes until they look soft, puffy, and full of air.
Step 8: Preheating Your Oven and Baking Surface
While your bread performs its final proof, place a large heavy baking stone or a steel baking sheet on the middle rack of your oven. On the bottom rack below it, place an empty metal cast iron skillet or baking tray. Turn your oven to its highest temperature setting, usually around 245 degrees Celsius, and let it heat thoroughly for at least forty five minutes so the internal baking surface gets extremely hot.
Step 9: Transferring and Baking with Steam
Carefully flip each delicate proofed loaf onto a piece of parchment paper so the floured bottom side is now facing up. Slide the parchment paper with the dough onto your hot preheated oven stone or baking sheet. Immediately pour one cup of boiling hot water into the empty hot metal skillet on the bottom rack to create a massive cloud of steam inside the oven, then close the oven door fast. Bake at 245 degrees Celsius with steam for fifteen minutes so the bread expands quickly and builds high volume.
Step 10: Finishing the Bake and Cooling Down
After fifteen minutes, carefully remove the steam tray from the bottom of the oven and reduce the oven temperature slightly to 220 degrees Celsius. Continue baking the loaves for another fifteen to eighteen minutes until the crust turns a rich dark golden brown color and feels crisp when tapped. Transfer your baked sourdough ciabatta onto a wire cooling rack and let the loaves cool down completely for at least one full hour before slicing. Slicing warm bread too early traps internal moisture, turning the open crumb gummy and soft instead of light and airy.
Why This Recipe Is Special
This specific sourdough ciabatta recipe stands out from standard bread baking guides because it balances high water content with effortless hand handling techniques. The high hydration level of over eighty percent creates super tender gluten strands that stretch easily without snapping under internal gas pressure. This allows massive natural gas pockets to form safely inside the dough, producing that classic open crumb structure that artisan bakers love to achieve.
From a health perspective, long natural fermentation offers remarkable benefits for your daily digestion and overall well-being. Sourdough starter contains wild lactobacilli bacteria that lower the pH of the dough during the bulk fermentation stage. This natural acidity neutralizes phytic acid, an antinutrient found in grains that normally blocks your body from absorbing essential minerals like magnesium, iron, and zinc. Furthermore, the slow fermentation process partially breaks down complex starches and wheat gluten proteins, making this bread far gentler on delicate digestive systems compared to quick rise breads made with commercial yeast.
The taste profile of this ciabatta is pure artisan quality. It delivers a pleasant butter like crunch on the outer crust that contrasts beautifully with a light, moist, and elastic center crumb. The natural sourdough culture adds a delicate flavor depth that is lightly tangy without overwhelming your palate, making it incredibly versatile for both savory and sweet meals.
Extra Tips for Better Taste
-
Use high protein bread flour with at least thirteen percent protein content to build strong gluten that holds high amounts of water easily.
-
Dust your shaping surface with coarse semolina flour instead of plain white flour to give the bottom crust an extra crispy texture and nutty flavor.
-
Rub fresh garlic cloves directly over the hot crispy crust right after the bread comes out of the oven for an instant garlic toast flavor boost.
-
Drizzle high quality cold pressed extra virgin olive oil over sliced ciabatta along with flaky sea salt for a simple, authentic Italian appetizer.
-
If your kitchen is cold, let your dough ferment inside an turned off oven with the internal light switched on to maintain a stable warm environment.
-
Add chopped fresh herbs like rosemary, thyme, or sun dried tomatoes into the dough during the second set of coil folds for amazing custom gourmet loaves.
Final Thoughts
Baking your own rustic sourdough ciabatta with a light open crumb is a wonderful culinary journey that brings comfort, joy, and healthy food into your kitchen. Do not be discouraged if your very first attempt looks a bit flat or rustic because working with wet high hydration dough takes a little practice and patience. Every single loaf you bake will teach you valuable lessons about temperature, timing, and dough texture. Share your fresh homemade loaves with family and friends, enjoy the process, and celebrate the amazing flavor of true artisan bread made with your own hands.
Nutrition Details
| Measurement Item | Value per Whole Recipe | Value per Serving (1 Slice) |
| Serving Size | Total Batch (2 Loaves) | 1 Slice (1 out of 12 total) |
| Total Calories | 1580 kcal | 131 kcal |
| Total Carbohydrates | 312 grams | 26 grams |
| Dietary Fiber | 12 grams | 1 gram |
| Total Sugars | 2 grams | 0.2 grams |
| Protein Content | 48 grams | 4 grams |
| Total Fat | 16 grams | 1.3 grams |
| Saturated Fat | 2.2 grams | 0.2 grams |
| Sodium Content | 3120 milligrams | 260 milligrams |
Disclaimer
This recipe and nutritional information are provided for general educational and informational purposes only. Everyone’s body, metabolic rate, and personal health needs are unique, so individual nutritional results and dietary tolerances may vary from person to person. If you have specific medical conditions, severe gluten sensitivities, or special nutritional requirements, please consult with a qualified doctor or professional registered dietitian before making significant changes to your regular daily diet.