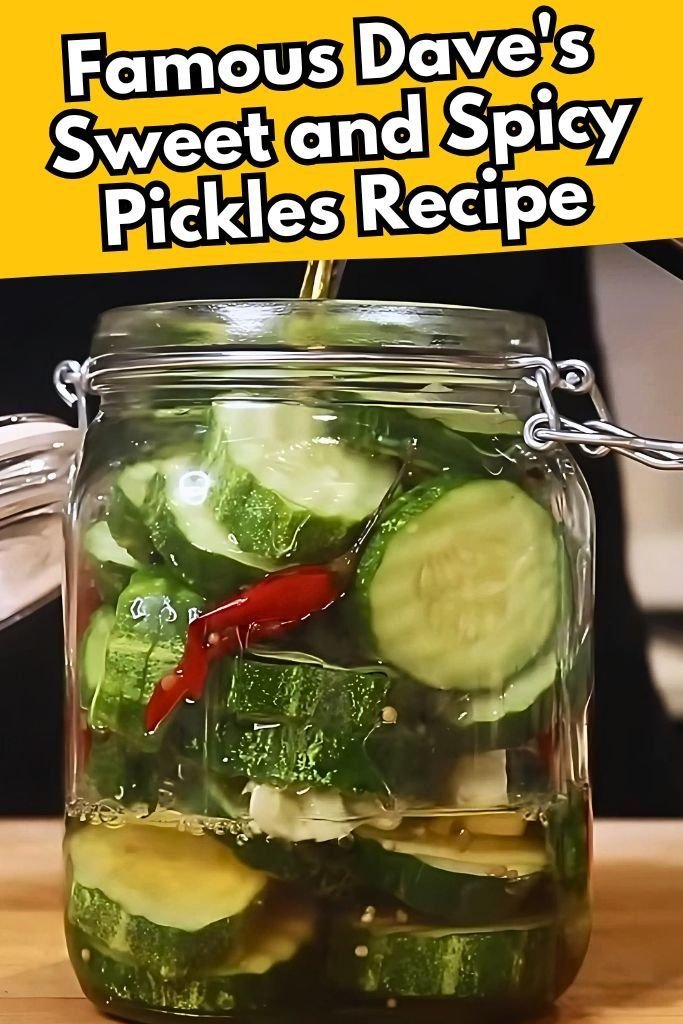
If you have ever purchased a jar of Famous Dave’s Sweet and Spicy Pickle Chips at your local grocery store, you already know how completely addictive they can be. This copycat recipe brings that exact legendary balance of mouthwatering sweetness and tangy pepper heat right into your own home kitchen. Making home canned pickles allows you to transform fresh, garden crisp cucumbers into golden, flavor packed slices that retain their satisfying crunch for months. You do not need any advanced culinary skills or expensive specialized tools to master this recipe, making it an ideal weekend project for home cooks of all skill levels. By controlling every simple ingredient that goes into your brine, you can enjoy a wholesome snack that avoids artificial preservatives and excessive sodium found in commercial brands. This detailed guide walks you through every single step of selecting vegetables, preparing spices, simmering brine, and safely processing your glass canning jars.
People everywhere absolutely love this signature pickle variation because it breaks away from the ordinary taste profiles of standard dill or overly sugary bread and butter chips. The secret lies in the brilliant contrast of pure white sugar, tangy vinegar, and fiery chili flakes that create a multi layered taste explosion on your tongue. When you take your very first bite, you are greeted by a pleasant initial sweetness that quickly evolves into a zesty, warming spice that lingers just long enough to make you reach for another slice. Food lovers adore pairing these vibrant green chips with juicy burgers, smoky pulled pork sandwiches, rich grilled cheese, or simple picnic cheese boards. Additionally, home canning provides a deep feeling of personal reward and traditional comfort that store bought snacks simply cannot replicate. Opening a jar you canned with your own hands brings immediate joy to everyday lunch tables and family dinner gatherings alike.
There are countless reasons and wonderful occasions to prepare this homemade pickle batch, whether you are driven by seasonal garden abundance, fitness goals, or pure emotional nostalgia. During peak summer months, backyard gardens often produce more cucumbers than a single family can eat before they go bad, making canning a smart way to preserve fresh harvests without wasting food. From a wellness perspective, pickles serve as a refreshing, low calorie snack that satisfies late night cravings for something crunchy and savory without adding unwanted heavy fats to your diet. Psychologically, spending an afternoon slicing fresh produce and filling glass jars offers a peaceful, therapeutic break from the busy digital world. Sharing customized gift jars adorned with ribbon during holidays or neighborhood potlucks also serves as a heartwarming gesture of friendship that shows genuine thought and personal effort.
Ingredients You Will Need
To ensure your canning project runs smoothly from start to finish, gather all your fresh produce, dry seasonings, and liquid base ingredients before starting your prep work. Precision in measurement helps guarantee ideal flavor balance and safe preservation levels.
-
8 cups fresh firm Kirby or pickling cucumbers, sliced into 1/4 inch thick rounds
-
2 cups granulated white sugar
-
2 cups apple cider vinegar with 5 percent acidity
-
1 cup distilled white vinegar with 5 percent acidity
-
1/2 cup cold water
-
2 tablespoons canning and pickling salt (do not use iodized table salt)
-
1 tablespoon whole mustard seeds
-
1 tablespoon crushed red pepper flakes (adjust up or down for custom heat)
-
1 teaspoon whole celery seeds
-
1/2 teaspoon ground turmeric powder
-
4 fresh garlic cloves, peeled and lightly smashed
-
1 medium yellow onion, sliced thinly into half moon strips
-
1/2 teaspoon black peppercorns
-
4 pint size glass canning jars with new lids and screw bands
Step by Step Method
Following clear, methodical instructions ensures your pickles retain maximum crispness while adhering to safe home preservation standards. Take your time during each stage of preparation.
Step 1: Clean and Prepare Fresh Vegetables
Wash all your pickling cucumbers thoroughly under cold running tap water to remove any dirt or garden debris. Trim off about 1/16 of an inch from the blossom end of each cucumber, as the blossom end contains natural enzymes that can soften pickles during storage. Slice the cleaned cucumbers into uniform rounds roughly 1/4 inch thick using a sharp chef knife or a kitchen mandoline slicer. Slice your medium yellow onion into thin half moon strips and peel your fresh garlic cloves.
Step 2: Crisp the Cucumber Slices
Place the sliced cucumber rounds and thin onion strips into a large non reactive mixing bowl. Sprinkle two tablespoons of pickling salt evenly over the vegetables and toss gently with clean hands to distribute the salt. Cover the bowl with a clean towel, add a generous layer of ice cubes over top, and let it sit at room temperature for two hours. This essential salting step draws out excess water from the vegetable cells, guaranteeing that your finished pickles remain incredibly crisp inside the jars.
Step 3: Rinse and Drain Thoroughly
After two hours have passed, discard the melted ice and pour the salted cucumber and onion mixture into a large colander placed inside your sink. Rinse the vegetables thoroughly with cold fresh water to wash away all excess surface salt. Allow the colander to sit in the sink for fifteen minutes, pressing down very gently with your hands to drain away every drop of remaining water. Transfer the drained cucumber and onion mixture into a clean dry bowl and set aside.
Step 4: Prepare Glass Jars and Canning Equipment
Inspect your four pint size glass canning jars for any tiny chips, cracks, or sharp edges around the top rim. Wash the jars, metal screw bands, and brand new lids in warm soapy water, then rinse them clean. Place a rack inside a large boiling water bath canner, set your clean jars upright inside, and fill the pot with water until the jars are completely submerged. Bring the pot to a simmer and keep the jars hot until you are ready to pack them with fresh food.
Step 5: Mix and Simmer the Spicy Brine
In a large stainless steel saucepan, combine the apple cider vinegar, distilled white vinegar, cold water, and granulated white sugar. Stir in the whole mustard seeds, crushed red pepper flakes, celery seeds, ground turmeric powder, black peppercorns, and smashed garlic cloves. Place the saucepan over medium high heat and bring the liquid to a rolling boil while stirring occasionally to dissolve the sugar completely. Once boiling, reduce the heat to low and let the spice brine simmer gently for five minutes to infuse all the rich flavors.
Step 6: Pack Vegetables into Hot Jars
Carefully remove one hot glass jar from the hot water bath using jar tongs, tilting it to drain excess water back into the pot. Pack the drained cucumber slices and onion strips tightly into the warm jar, leaving about 1/2 inch of space at the top rim. Repeat this process for all four pint jars until all your prepared vegetables are evenly distributed.
Step 7: Pour Hot Brine Over Packed Pickles
Carefully ladle the hot simmering brine into each filled jar over the cucumber slices using a wide mouth canning funnel. Ensure that all cucumber slices are fully submerged in liquid while maintaining a full 1/2 inch of empty headspace at the top of each jar rim. Insert a clean silicone bubble remover tool or wooden skewer inside each jar, gently pressing along the inner walls to release any trapped air bubbles. Top up with extra hot brine if necessary to maintain the exact 1/2 inch headspace mark.
Step 8: Seal Jars and Process in Water Bath
Wipe the top glass rims of each packed jar with a clean damp paper towel to remove any sweet brine drips or seed residue that could prevent an airtight seal. Place a flat canning lid centered over each jar rim and screw the metal band on until it is finger tip tight (do not overtighten). Lower the filled jars carefully back into the boiling water bath canner using your jar lifter tool, ensuring water covers the jar tops by at least one full inch. Cover the pot with its lid, bring the water to a full rolling boil, and process the jars for ten minutes.
Step 9: Cool and Test Jar Seals
When the ten minute processing time is finished, turn off the heat burner and remove the pot lid. Let the jars sit undisturbed in the hot water for five extra minutes to stabilize internal pressure. Use your jar lifter tool to remove the jars vertically from the pot and place them upright on a clean kitchen towel laid out on your countertop. Allow the jars to cool undisturbed at room temperature for twelve to twenty four hours without touching or pressing the centers of the lids. You will hear satisfying popping sounds as the cooling air contracts inside the jars, pulling the metal lids down into a secure vacuum seal.
Step 10: Store and Mature Your Pickles
After twenty four hours of cooling, press the center of each metal lid with your finger to verify that it is fully firm and does not flex or pop up. Wipe down the outside of the glass jars with a damp cloth, remove the outer metal rings if desired, and label each jar with the current date. Store your sealed pickle jars in a cool, dark, and dry pantry location for at least two full weeks before opening the first jar. This critical waiting period allows the complex sweet and spicy spice notes to penetrate deep into the center of every crisp cucumber slice.
Why This Recipe Is Special
This copycat pickle recipe stands out as a true culinary gem because it balances convenience, intense taste depth, and wholesome homemade quality in one easy package. Unlike mass produced commercial pickles that often rely on artificial yellow dyes, chemical preservatives, and excessive corn syrup, this recipe relies entirely on pure whole ingredients. The golden yellow color comes naturally from antioxidant rich ground turmeric powder, while the distinct warmth is driven by authentic crushed red pepper flakes and crushed garlic.
From a health standpoint, home preserved pickles can fit wonderfully into a balanced lifestyle when enjoyed as a flavorful condiment. Cucumbers naturally contain high amounts of water and helpful dietary fiber, which aids digestion and promotes feelings of fullness between regular meals. Vinegar has been widely studied for its potential role in supporting healthy blood sugar metabolism and encouraging smooth digestive function after eating heavy meals. Furthermore, opting to eat low calorie, highly satisfying snacks like spicy pickles can help you manage total daily calorie intake without feeling deprived of big, bold flavors.
The taste experience delivered by this formula is genuinely unmatched compared to ordinary store bought alternatives. The dual vinegar base combines the fruity, mellow notes of apple cider vinegar with the clean, sharp acidity of white vinegar, creating a bright foundation for the white sugar to balance out. As the pickles rest in your pantry over time, the mustard seeds and celery seeds release essential natural oils that soften the harshness of the vinegar, turning every slice into a crisp, savory flavor bomb that elevated basic everyday meals into gourmet experiences.
Extra Tips for Better Taste
To take your homemade sweet and spicy pickles from great to truly exceptional, consider applying these creative kitchen tips during your preparation process.
-
Use grape leaves or oak leaves inside your jars: Placing a clean, unsprayed grape leaf or oak leaf at the bottom of each canning jar adds natural tannins that keep cucumber skin incredibly firm and crunchy over long storage months.
-
Add fresh hot peppers for extra heat: If you prefer an intense fire on your palate, add thin slices of fresh jalapeno, serrano, or habanero peppers alongside your cucumber rounds before pouring in the hot brine.
-
Chill cucumbers in ice water overnight: For the absolute ultimate crispiness, soak your whole unpeeled cucumbers in a bucket of ice water inside your refrigerator for twelve hours before slicing and salting them.
-
Try brown sugar for richer depth: Replace half of the white granulated sugar with dark brown sugar to introduce subtle molasses and caramel notes that complement grilled steaks and barbecue pork ribs exceptionally well.
-
Do not skip the resting time: While it is tempting to pop open a fresh jar after twenty four hours, waiting three full weeks allows the vinegar acidity to mellow out and fully blend with the garlic and chili spices.
Final Thoughts
Creating your own batch of Famous Dave’s Sweet and Spicy Pickle Copycat chips brings genuine joy to your home kitchen and immense satisfaction to your dining table. With basic pantry staples and fresh summer cucumbers, you can craft gourmet condiment jars that outshine store bought options in both freshness and flavor depth. Sharing these homemade gems with family, friends, and neighbors creates lasting kitchen memories and offers a rewarding way to preserve fresh garden harvests all year long. Grab your apron, slice up those fresh cucumbers, and enjoy every single bite of this crisp, sweet, and fiery home creation!
Nutrition Details
Below is the approximate nutritional profile calculated per individual serving size (about 30 grams or 3 to 4 pickle chips). Actual values may vary slightly based on cucumber size and precise brine absorption.
| Nutrient Component | Amount Per Serving | Daily Value Percentage |
| Calories | 35 kcal | 2 percent |
| Total Carbohydrates | 8 grams | 3 percent |
| Dietary Fiber | 0.5 grams | 2 percent |
| Sugars | 7 grams | 14 percent |
| Sodium | 180 milligrams | 8 percent |
| Protein | 0.3 grams | 1 percent |
| Total Fat | 0.1 grams | 0 percent |
| Vitamin C | 1.2 milligrams | 2 percent |
| Calcium | 12 milligrams | 1 percent |
| Iron | 0.2 milligrams | 1 percent |
| Potassium | 45 milligrams | 1 percent |
Disclaimer
This article and recipe are intended strictly for general educational and informational purposes. Everyone’s body, dietary requirements, metabolic health, and nutritional needs are unique, meaning individual digestion and health responses to foods will vary. If you are following a strict low sodium diet, managing blood sugar conditions like diabetes, or living with digestive disorders like acid reflux, please consult with a qualified medical professional or certified dietitian before introducing high sodium or highly acidic foods into your regular daily routine. Safe home canning guidelines set by official agricultural extensions should always be strictly followed to prevent food spoilage or contamination.