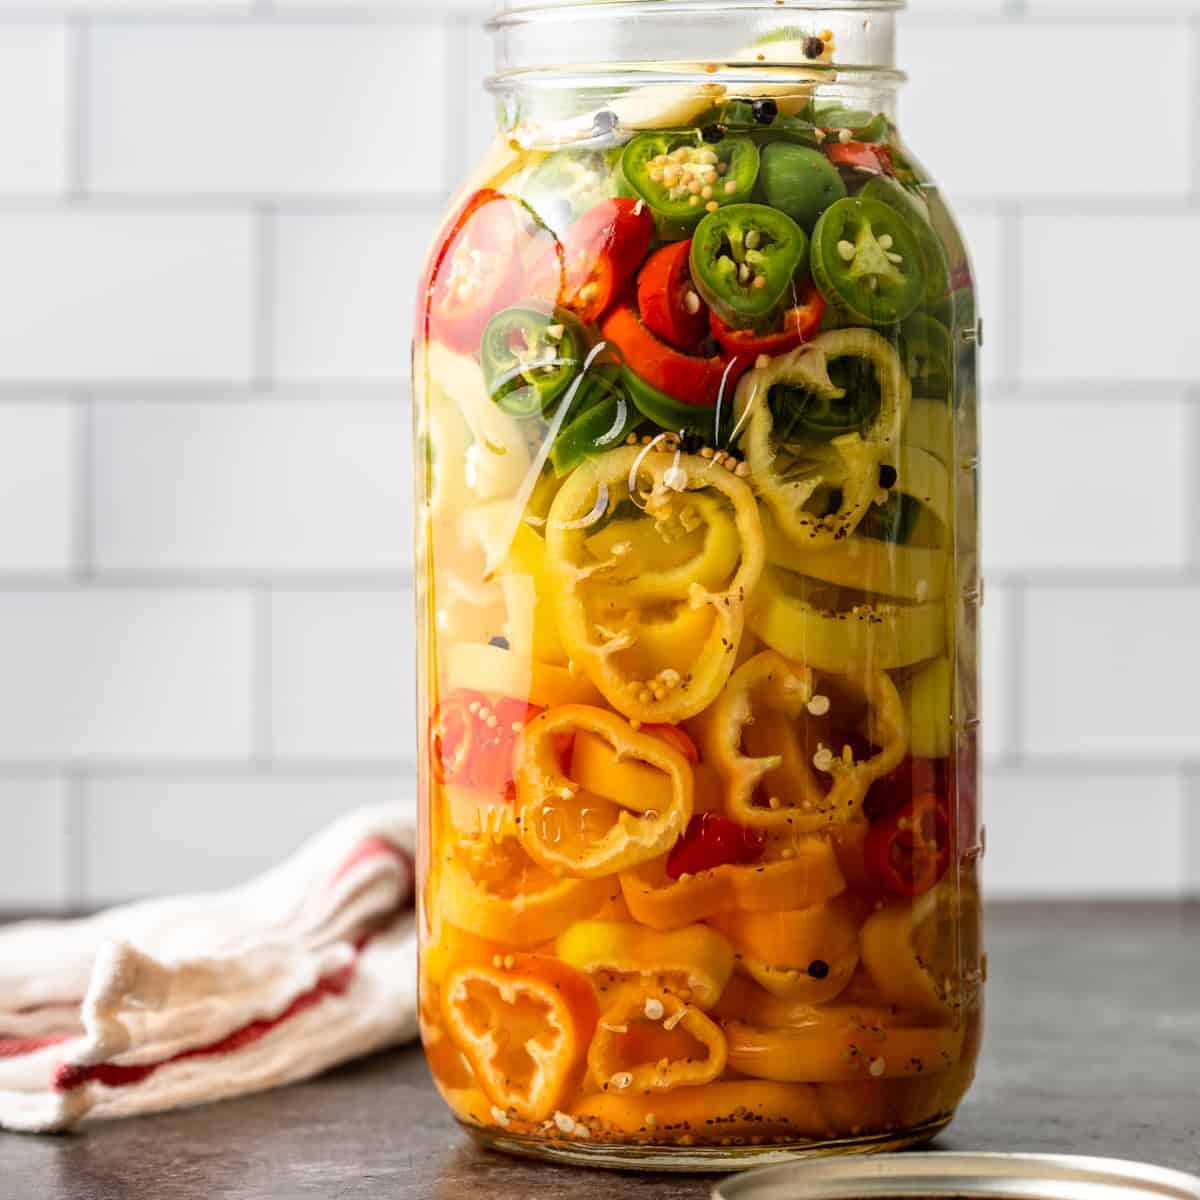
Pickling and canning peppers at home is one of the most rewarding kitchen projects you can ever take on. This simple recipe brings together the fiery heat of green jalapeños and the smooth sweet taste of bell peppers or sweet mini peppers, creating a perfect balanced mix. When you preserve fresh peppers in a hot vinegary brine, you lock in their crunchy texture and brighten their natural flavors for months to come. Many people think that home canning is a lost art reserved only for older generations, but making your own jarred peppers is actually quite simple, fast, and incredibly satisfying. Whether you are an experienced home gardener looking to deal with an overflowing harvest or just someone who loves adding a tasty spicy kick to everyday dinners, learning how to make homemade pickled jalapeño and sweet peppers will instantly elevate your daily cooking routine.
People around the world absolutely love this specific recipe because it offers a perfect harmony between intense spice and soft sweetness. Plain pickled jalapeños can sometimes feel a bit too hot for sensitive palates, while sweet pickled peppers might lack that exciting pop of heat that makes snack foods so thrilling to eat. By combining both varieties into a single jar, you get the best of both worlds in every single bite. The tangy vinegar solution permeates the crisp vegetable walls, softening the aggressive raw bite of the raw peppers while leaving behind a satisfying crunch that makes sandwiches, tacos, and nachos taste completely fresh. Opening a jar of these colorful homemade pickled peppers feels like opening a jar of captured summer sunshine, making your kitchen smell wonderful with bright notes of garlic, herbs, and tangy vinegar.
There are so many fantastic reasons to make your own batch of pickled jalapeños and sweet peppers today. From an emotional perspective, preparing home preserved food connects you deeply to wholesome culinary traditions and gives you a wonderful feeling of self reliance. Watching colorful red, yellow, and green pepper slices bob gently inside sparkling glass jars lined up on your kitchen counter brings genuine joy and pride. From a taste perspective, store bought pickled peppers simply cannot compete with the fresh flavor and customizable spice level of a homemade batch. Commercial varieties often contain harsh chemical preservatives, artificial dyes, or excessive amounts of salt that mask the real vegetable taste. From a wellness perspective, adding pickled peppers to your diet is a low calorie, low fat way to bring huge flavor to lean protein dishes, whole grain bowls, and fresh salads without relying on heavy sauces or creamy dressings.
Another major reason to try this recipe right now is the sheer convenience it brings to your daily meal planning. Having a couple of ready to eat jars sitting in your pantry or refrigerator means you always have a quick gourmet topping available at a moment’s notice. You can toss these pickled slices onto a weekend pizza, fold them into morning scrambled eggs, pile them high on grilled turkey burgers, or blend them into homemade salsas for family gatherings. They also make thoughtful, beautiful homemade gifts for friends, family members, coworkers, or neighbors who appreciate good food. Once you experience how easy the preparation process is and taste the incredible difference in quality, you will never want to buy mass produced store bought jars ever again.
Ingredients You Will Need
-
1 pound fresh jalapeño peppers, sliced into uniform thin rings
-
1 pound fresh sweet peppers, mix of red, yellow, and orange, sliced into thin rings
-
3 cups white distilled vinegar, 5 percent acidity
-
3 cups clean unfiltered water
-
2 tablespoons pickling salt or coarse kosher salt, non iodized
-
2 tablespoons granulated white sugar
-
6 whole cloves fresh garlic, peeled and lightly crushed
-
2 teaspoons whole black peppercorns
-
2 teaspoons whole mustard seeds
-
1 teaspoon whole coriander seeds
-
4 small fresh bay leaves, one per jar
Step by Step Method
Step 1: Prepare Your Equipment and Sterilize Jars
Start by inspecting four pint sized glass canning jars for any tiny cracks or chips along the rims. Wash the jars, metal screw bands, and new flat lids in hot soapy water, rinsing them very well. Place a large water bath canner or a deep stockpot on your stove, place a rack at the bottom, and stand your clean jars inside. Fill the pot with water until the jars are completely covered by at least one inch of water. Turn the heat to high and bring the water to a simmer, keeping the jars hot until you are ready to pack them with your fresh ingredients. Keeping jars hot prevents them from cracking when filled with warm liquid.
Step 2: Wash and Slice the Fresh Peppers
Wash all of your jalapeños and sweet peppers thoroughly under cold running water to remove any dirt or garden debris. Pat them completely dry with a clean kitchen towel. Put on a pair of disposable food safe gloves before handling the spicy jalapeños to protect your hands and prevent burning your skin or eyes. Slice off the stem ends of all the peppers and discard them. Slice the jalapeños and sweet peppers into thin, uniform rounds about one quarter inch thick. You can leave the seeds and inner white ribs intact for a spicier finished product, or scrape them out if you prefer a milder taste. Mix the colorful pepper slices together in a large bowl.
Step 3: Cook the Tangy Vinegar Brine
In a medium stainless steel saucepan, combine three cups of white distilled vinegar, three cups of clean water, two tablespoons of pickling salt, and two tablespoons of white sugar. Place the saucepan over medium high heat on your stove. Stir the mixture continuously until the salt crystals and sugar grains dissolve completely into the liquid. Bring the liquid to a rolling boil, then reduce the heat slightly to maintain a gentle simmer. Let the brine simmer uncovered while you prepare the jars.
Step 4: Pack the Jars with Spices and Peppers
Using jar tongs, carefully remove the hot sterilized jars from the simmering water bath pot and place them upright on a clean kitchen towel laid over your counter. Drop one crushed garlic clove, half a teaspoon of black peppercorns, half a teaspoon of mustard seeds, a quarter teaspoon of coriander seeds, and one fresh bay leaf into the bottom of each hot jar. Carefully pack the mixed pepper slices tightly into each jar, layering green jalapeño rings with bright red, yellow, and orange sweet pepper rings. Leave about half an inch of empty space, known as headspace, at the top of each jar.
Step 5: Pour the Brine and Remove Air Bubbles
Carefully ladle the hot simmering vinegar brine into each filled jar using a wide mouth funnel. Make sure the liquid completely submerges all the pepper slices while maintaining a clear half inch of headspace at the top rim. Insert a clean plastic bubble remover tool or a thin wooden skewer down into the sides of the jars, gently pressing the peppers to release any trapped air bubbles. Top off the brine if the liquid level drops after releasing the trapped air.
Step 6: Clean Rims and Secure Lids
Take a clean, damp paper towel and thoroughly wipe the top glass rims and threads of each jar to remove any traces of brine, salt, or small seeds. Any leftover residue on the rim can prevent the rubber gasket on the lid from forming a proper seal. Place a flat canning lid onto the top of each jar, centering it carefully. Screw the metal band over the lid until it is fingertip tight, which means turning it until you feel resistance, but without forcing it overly tight.
Step 7: Process Jars in Water Bath Canner
Lower the filled jars back into the pot of hot water using your jar lifter tool, making sure the jars do not touch each other directly. Ensure that the water level covers the tops of the jars by at least one inch, adding more boiling water if necessary. Place the lid on the pot and bring the water back to a full rolling boil. Once boiling, process the jars for ten full minutes. Adjust processing time if you live at high altitudes according to standard home preservation guidelines.
Step 8: Cool and Test the Seals
When the ten minute processing time is finished, turn off the burner and carefully remove the pot lid away from your face to avoid steam burns. Let the jars sit inside the hot water for five minutes to settle. Use your jar lifter to remove the jars straight up without tilting them, and place them on a thick towel in a draft free area on your counter. Allow the jars to cool undisturbed for twelve to twenty four hours. As they cool, you will hear a satisfying popping sound indicating that the lids have sealed properly. Press the center of each lid after cooling; if it stays down and does not flex, your jar is securely sealed.
Why This Recipe Is Special
This pickled pepper recipe stands out because it strikes an ideal balance between bold culinary flavor and fantastic everyday health advantages. Combining sweet peppers with fiery jalapeños creates a dynamic flavor profile that plain single vegetable pickling simply cannot achieve. Sweet peppers are naturally rich in essential nutrients, particularly vitamin C and vitamin A, which help support your immune system and promote healthy, radiant skin. Jalapeños contain a powerful natural compound called capsaicin, which gives them their signature spicy heat. Capsaicin has been studied for its ability to naturally boost metabolism, support digestion, and encourage the release of endorphins that elevate your mood.
From a fitness and calorie perspective, pickled peppers are a dream ingredient for anyone trying to eat clean without sacrificing satisfaction. They contain virtually zero fat and very few calories per serving, yet they deliver a huge punch of bright, bold taste. Adding a small handful of these peppers to plain grilled chicken breast or baked white fish turns a simple diet meal into a memorable feast. Furthermore, using a homemade pickling brine gives you full control over the ingredients, ensuring that you consume less sodium and zero harsh synthetic chemicals compared to store bought canned goods.
Another unique element of this recipe is its long shelf life and versatile culinary use. The natural acidity of the distilled white vinegar creates a safe environment that preserves the fresh texture of the vegetables for months without needing artificial stabilizers. Opening a jar months after canning still delivers a fresh, crunchy snap that tastes just like the day you made it. Whether you are aiming to eat healthier, impress guests with artisanal pantry goods, or save money by preserving garden vegetables, this recipe covers every base with ease.
Extra Tips for Better Taste
-
Use extremely fresh, firm peppers with smooth, shiny skin for the best crunch. Avoid peppers that are soft, wrinkled, or show signs of bruising.
-
If you want to keep your pepper slices extra crisp, you can add a pinch of pickle crisp granules containing calcium chloride to each jar before pouring the hot brine.
-
Feel free to customize the spice blends inside each jar by adding fresh dill sprigs, sliced carrots, thin onion rounds, or crushed red pepper flakes for extra heat.
-
Allow the sealed jars to store in a cool, dark pantry for at least two weeks before opening them so the flavors can fully marry together.
-
Always chill the jar in your refrigerator for a few hours before serving, as cold pickled peppers have a much firmer, crunchier mouthfeel than warm ones.
-
Reuse any leftover pickle brine after finishing the peppers by using it as a tangy base for homemade salad dressings or potato salad dressings.
Final Thoughts
Making your own canned pickled jalapeño and sweet peppers is a truly delightful kitchen endeavor that rewards a little effort with incredible long term flavor. By following these basic, clear steps, you can safely create beautiful jars of vibrant, tasty peppers that bring excitement to any meal on your weekly menu. You will love having these delicious, tangy treats sitting ready in your pantry whenever your favorite dishes need an extra pop of color and spice. Take your time, enjoy the process, and share these tasty jars with the people you love most.
Nutrition Details
| Component | Amount Per Serving | Daily Value Percentage |
| Serving Size | 2 tablespoons (about 30g) | N/A |
| Total Calories | 15 kcal | 1% |
| Total Carbohydrates | 3 g | 1% |
| Dietary Fiber | 1 g | 4% |
| Sugars | 2 g | N/A |
| Protein | 0.5 g | 1% |
| Total Fat | 0 g | 0% |
| Saturated Fat | 0 g | 0% |
| Cholesterol | 0 mg | 0% |
| Sodium | 180 mg | 8% |
| Vitamin C | 25 mg | 28% |
| Vitamin A | 300 IU | 6% |
| Calcium | 10 mg | 1% |
| Iron | 0.2 mg | 1% |
Disclaimer
Everyone’s body and digestive system are unique, so individual nutritional needs and reactions to spicy foods can vary. The health information provided in this article is for educational purposes only and should not replace professional medical advice. If you have stomach sensitivities, acid reflux, or specific dietary restrictions, please consult with a qualified health professional before consuming spicy or highly acidic foods.