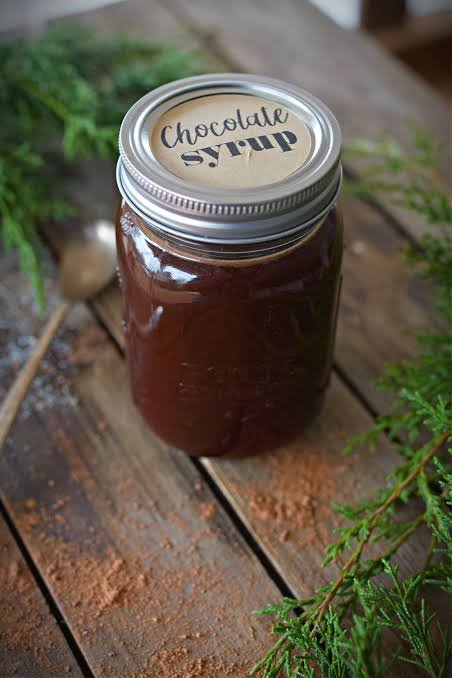
Canning chocolate syrup is one of the most delightful kitchen projects you can ever take on at home because it allows you to create a smooth, velvety, and deeply rich treat that stays fresh in your pantry for a long time. Many people think that making homemade syrup is a complicated task reserved only for expert chefs, but the truth is that it is surprisingly straightforward when you follow a basic method step by step. When you make your own syrup, you gain total control over the ingredients, meaning you can avoid the artificial preservatives, high fructose corn syrup, and synthetic flavorings commonly found in commercial store bought brands. Imagine having a cupboard filled with jars of deep, glossy brown goodness that you can pull out whenever you crave a sweet treat, whether you want to stir it into warm milk, pour it over fresh fruits, or drizzle it generously on top of cold ice cream. The process of warming cocoa powder, sugar, water, and vanilla together creates an amazing aroma that fills your whole home with the comforting scent of a luxury chocolate shop, making the canning process feel like a fun and rewarding hobby rather than a routine cooking chore.
People absolutely love this recipe because it brings back warm memories of childhood comfort while providing a far superior flavor profile compared to anything you can buy in a plastic squeeze bottle. There is a special kind of magic in opening a freshly preserved jar and watching the thick, silky liquid glide off your spoon in a slow, elegant stream that coats everything it touches with pure sweetness. Food lovers appreciate how versatile this sauce is, as it can transform a simple morning coffee into a rich mocha or turn an ordinary stack of fluffy pancakes into a celebratory weekend breakfast for the whole family. Friends and family members are always impressed when you hand them a beautiful glass jar sealed with a custom label, making it one of the most thoughtful handmade gifts you can give during holidays, birthdays, or dinner parties. Beyond the sheer pleasure of taste, making it yourself gives you immense satisfaction because you know exactly what went into the pot, ensuring every single spoonful is pure, wholesome, and made with genuine care.
There are so many fantastic reasons to make and preserve this delicious sauce, whether you are driven by emotional comfort, intense flavor cravings, or mindful health choices in your daily lifestyle. Emotionally, stirring a hot pot of chocolate on a cold evening brings a sense of deep peace and cozy relaxation that reduces daily stress and makes your kitchen feel like the warmest place in the world. From a taste perspective, store bought versions often taste flat, overly sugary, or metallic, whereas a homemade batch uses quality cocoa that offers a balanced depth of real dark chocolate notes paired with a pinch of salt and sweet vanilla extract. From a fitness and health perspective, crafting your own syrup allows you to choose organic dark cocoa powders packed with natural antioxidants, and you can easily adjust the sugar levels or swap standard water for liquid bases that fit your specific diet needs. Whether you are prepping your pantry for busy school mornings, hosting an ice cream party for neighbors, or simply looking for a quick pick me up after a long workout day, having ready to use chocolate sauce sitting on your shelf is a small daily luxury that brings endless joy to your table.
Starting your canning journey with this recipe is also a brilliant way to build confidence in home food preservation because it uses accessible tools and familiar household ingredients without requiring any complex culinary machinery. Once you master this simple process, you will feel empowered to stock your pantry with home preserves, knowing that you are saving money while providing your family with delicious treats free from mysterious additives. Having a reliable supply of rich syrup on hand eliminates midnight store runs when sudden cravings strike, giving you instant access to a cozy cup of hot cocoa or a decadent dessert topping at a moment’s notice. The shelf stable nature of correctly processed jars means you can prepare one large batch on a quiet afternoon and enjoy the fruit of your minimal labor for many months to come. As you watch the liquid thicken and take on its shiny finish in the saucepan, you will realize that high quality dessert making is entirely within your reach, inspiring you to experiment with new flavors, creative dessert pairings, and lovely homemade food gifts.
Ingredients You Will Need
To make a large batch of homemade chocolate syrup for canning, gather the following carefully measured ingredients:
Two cups of unsweetened high quality cocoa powder
Three cups of white granulated sugar
Two cups of clean filtered water
One cup of light corn syrup or brown rice syrup
Two teaspoons of pure vanilla extract
One half teaspoon of fine sea salt
Step by Step Method
Step one is preparing your work area and getting your equipment completely ready before starting any heat processing. Wash your glass canning jars, metal lids, and screw bands in warm soapy water, then rinse them thoroughly to make sure no soap residue remains. Place your clean jars inside a large stockpot filled with hot water and bring it to a gentle simmer so your jars stay warm, which prevents the glass from cracking when hot liquid is poured inside later.
Step two is mixing the dry ingredients together in a heavy bottomed saucepan. Measure out the two cups of unsweetened cocoa powder and three cups of white granulated sugar, then pour them directly into your dry saucepan. Add the one half teaspoon of fine sea salt to the mix, then use a wire whisk to blend everything together until there are no clumps of cocoa remaining and the mixture looks completely uniform.
Step three is incorporating the liquid ingredients slowly to form a smooth paste. Measure two cups of clean filtered water and one cup of light corn syrup, then slowly pour a small stream of water into the dry sugar and cocoa mixture while whisking constantly. Whisking continuously as you add the liquid ensures that the cocoa dissolves fully without forming stubborn powdery lumps on the bottom or sides of the pot.
Step four is heating the chocolate mixture over medium heat on your stove. Place the saucepan on your burner and turn the knob to medium temperature, continuing to stir gently with a long handle wooden spoon or whisk. Keep stirring continuously as the pan warms up so that the sugar dissolves completely and the syrup does not stick to the bottom of the pan and burn.
Step five is bringing the syrup to a gentle, steady boil. Watch the pot carefully as it heats up, and once small bubbles start popping across the entire surface, lower the heat slightly to maintain a gentle simmer. Let the liquid simmer slowly for about five minutes while stirring often, which allows the syrup to thicken nicely and achieve a uniform glossy texture throughout the pot.
Step five point five is adding the final aromatic touch right before filling your jars. Turn off the stovetop heat completely and remove the saucepan from the hot burner. Measure two teaspoons of pure vanilla extract and pour it into the warm sauce, stirring well so the vanilla aroma distributes evenly through the whole batch without evaporating during high heat boiling.
Step six is filling your warm glass jars carefully with the finished hot liquid. Carefully remove one warm jar from your hot water pot using jar tongs, resting it on a clean cloth towel on your kitchen counter. Place a wide mouth canning funnel on top of the jar, then use a ladle to pour the hot chocolate sauce into the jar, leaving about one half inch of space at the top, which is called headspace.
Step seven is wiping the rims clean and adjusting the lids properly. Take a fresh paper towel dampened with warm water and carefully wipe the top rim of the glass jar to remove any tiny drips of chocolate sauce. Place a clean metal lid flat on top of the jar rim, then screw the metal band over the lid using only your fingertips to make it finger tight without forcing it too tightly.
Step eight is processing the filled jars in a hot water bath. Place the sealed jars upright onto the rack inside your large stockpot filled with hot water, making sure that at least one inch of water covers the tops of the jars completely. Put the lid on your large pot, turn the burner to high heat, and bring the water to a full rolling boil. Once the water boils vigorously, start a timer for fifteen minutes to process the jars safely.
Step nine is cooling and testing the jar seals properly. After the fifteen minute timer finishes, turn off the burner heat and remove the pot lid carefully, letting the steam escape away from your face. Use your jar tongs to lift the hot jars straight up out of the water and place them on a dry towel on your counter, leaving at least one inch of space between each jar so air can circulate around them as they cool down completely for twelve to twenty four hours without being touched or moved. After cooling, press down on the center of each metal lid with your finger; if the lid stays flat and does not flex or make a popping sound, your jar is fully sealed and ready for long term pantry storage.
Why This Recipe Is Special
This homemade canning chocolate syrup recipe is truly special because it bridges the gap between indulgent taste and clean kitchen ingredients. Commercial chocolate products are usually packed with artificial ingredients, chemical emulsifiers, artificial colors, and cheap high fructose corn syrup that can leave an unpleasant aftertaste in your mouth. By making this version at home, you get a clean product made from simple pantry staples that you can read, recognize, and feel good about serving to your family and friends.
From a health standpoint, choosing cocoa powder gives you access to naturally occurring plant compounds called flavonoids, which are powerful antioxidants known to support heart health and promote good circulation throughout the human body. Dark cocoa is also a great source of essential minerals like magnesium, iron, and potassium that contribute to daily energy levels and proper muscle function. Since you control the recipe, you can choose organic ingredients or use darker cocoa varieties to boost the antioxidant power while keeping unwanted additives completely out of your diet.
From a taste perspective, the combination of rich cocoa, pure vanilla extract, and a pinch of fine sea salt creates a deeply satisfying flavor profile that puts commercial brands to shame. The salt balances the sweetness of the sugar, while the vanilla extract rounds out the intense cocoa notes, creating a luscious sauce with a perfect smooth consistency. Whether served hot or cold, the texture remains silky smooth, allowing it to blend effortlessly into beverages or drizzle smoothly over your favorite desserts without separating or turning grainy over time.
Extra Tips for Better Taste
To elevate your homemade sauce to an even higher level of gourmet flavor, try experimenting with small flavor additions during the cooking stage. Adding one half teaspoon of instant espresso powder or fine coffee granules to the dry cocoa mixture will not make your syrup taste like coffee, but it will dramatically intensify the natural chocolate flavor, making it taste deeper and more luxurious.
If you love warm aromatic spices, consider whisking in one half teaspoon of ground cinnamon or a tiny pinch of cayenne pepper into the pot while simmering. Cinnamon adds a lovely cozy warmth that pairs brilliantly with winter drinks, while a tiny pinch of cayenne pepper creates a subtle Mexican spicy cocoa style kick that excites your taste buds and contrasts delightfully with sweet ice cream.
You can also customize the final flavor by trying different types of extracts in place of or alongside the vanilla extract. A few drops of pure peppermint extract added at the end of cooking transforms the sauce into a festive holiday treat that tastes amazing stirred into hot milk. Alternatively, using pure almond extract or orange extract offers a sophisticated nutty or citrus twist that turns simple fruit plates into restaurant quality desserts.
For those who want a richer, more velvety texture, swapping half of the plain water for brewed black tea or subtle herbal infusions can add complex flavor layers. Always make sure to use high quality cocoa powder, such as Dutch processed cocoa for a milder, smoother taste or natural dark cocoa for a bold, bittersweet chocolate profile that stands out in any dish.
Final Thoughts
Making your own canned chocolate syrup is a fun, easy, and deeply satisfying cooking project that fills your home with incredible aromas and gives you a pantry full of delicious treats. Whether you enjoy it drizzled over homemade vanilla ice cream, stirred into a steaming mug of hot milk on a snowy afternoon, or wrapped up with a colorful ribbon as a gift for someone special, this simple recipe brings warmth and joy to any occasion. Take your time, follow each step carefully, and enjoy the wonderful process of creating wholesome, rich homemade goodies right in your own kitchen.
Nutrition Details
Here is the approximate nutrition information for this recipe, calculated per serving based on a standard serving size of two tablespoons:
Nutrition Table Per Serving
Serving Size: Two Tablespoons
Calories: Ninety calories
Total Fat: Zero point five grams
Saturated Fat: Zero point three grams
Sodium: Forty milligrams
Total Carbohydrates: Twenty two grams
Dietary Fiber: One point five grams
Total Sugars: Eighteen grams
Protein: One gram
Calcium: Ten milligrams
Iron: One milligram
Potassium: Eighty milligrams
Disclaimer
Please remember that every individual body is unique and nutritional requirements or dietary responses can vary from person to person. The nutrition information provided in this article is an estimate calculated using standard ingredient databases and should be used as a general guide rather than exact medical advice. Results, taste preference, and dietary suitability may change depending on the specific brands of ingredients you choose, your personal health conditions, and individual lifestyle needs. Always consult with a qualified health professional or registered dietitian if you have specific dietary restrictions, health concerns, or medical conditions regarding sugar intake and nutrition.