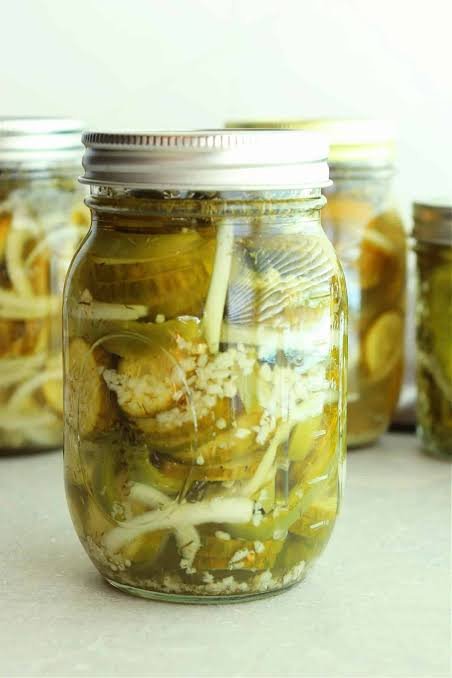
Canning crunchy garden cucumber slim salad is one of the most wonderful ways to save the fresh taste of summer inside a glass jar so you can enjoy it all year long. When your garden gives you a huge harvest of fresh green cucumbers, you might feel overwhelmed trying to figure out how to use them all before they spoil on your counter. This traditional home preservation recipe transforms ordinary fresh cucumbers into a delicious, tangy, crispy treat that stays full of life and flavor for months. Unlike high calorie store bought pickles or heavy creamy salads, this special slim salad focuses on light ingredients, simple kitchen spices, and natural vinegars that enhance the natural crispness of the vegetables. It is a fantastic choice for home cooks who want to learn the classic art of home canning without feeling confused by complicated steps or fancy equipment. As you slice the crisp green vegetables and prepare the warm tangy brine, your entire kitchen will be filled with a fresh, appetizing aroma that instantly makes your mouth water. Every single jar you fill becomes a little treasure chest of healthy flavor, ready to be pulled from your pantry whenever you need a quick side dish or a satisfying snack.
People absolutely love this recipe because it delivers an irresistible combination of snappy crunch, bright acidity, and gentle natural sweetness that brightens up almost any meal you serve. Many traditional pickle recipes can end up soft or soggy over time, but this special method uses specific slicing techniques and natural salt drawing steps to keep every cucumber slice amazingly firm. The delicate balance of cool cucumbers, crisp sweet onions, and colorful bell peppers creates a wonderful contrast of textures in every bite. Busy parents and working professionals appreciate having these pre made jars sitting in their pantry because they offer instant flavor without any meal preparation stress during busy weeknights. Children enjoy the satisfying sound of the fresh crunch, while adults appreciate the clean, guilt free taste that does not weigh down their stomach after eating. Furthermore, sharing handmade jars of canned cucumber salad with your neighbors, friends, and family members is a thoughtful tradition that brings people closer together through wholesome homemade food. It is truly a crowd pleasing recipe that brings big smiles to the dinner table every single time you open a fresh lid.
You should make this recipe whenever your garden is bursting with mature cucumbers, or when you find a great bargain on fresh produce at your local farmers market. Beyond just dealing with a surplus harvest, preparing this salad is a deeply rewarding weekend activity that connects you to simple, traditional ways of living and mindful cooking. Eating this light cucumber salad is also a fantastic decision for anyone following a health conscious lifestyle, low calorie diet, or fitness routine because it satisfies your craving for savory, crunchy food without adding extra fats or heavy carbs. When cold winter months arrive and fresh garden produce is hard to find, opening a jar of this bright green salad instantly brings back warm memories of summer sunshine and outdoor picnics. It serves as an ideal side dish for family barbecues, roasted meats, simple sandwiches, grain bowls, and crisp dinner salads, adding a zesty pop of contrast to richer main courses. Whether you are aiming to eat cleaner, cut down on daily meal preparation time, or simply enjoy the emotional comfort of a well stocked pantry, this recipe fits perfectly into your lifestyle.
Taking the time to preserve your own food gives you complete peace of mind because you control every single ingredient that enters your home and goes into your body. Standard commercial foods found on grocery store shelves are often loaded with artificial preservatives, chemical additives, excess refined sugars, and harsh yellow dyes that you simply do not need in your diet. When you craft this recipe at home, you get to choose peak freshness, crisp organic produce, and pure, high quality spices that nourish your family safely. The process of watching the bright jars cool down on your kitchen counter while listening to the satisfying pop of sealing lids brings a unique feeling of pride and deep satisfaction. You realize that you have created something wholesome, beautiful, and completely delicious using simple tools and basic ingredients from nature. It is an empowering culinary skill that saves you money, cuts down on food waste, and elevates your everyday eating experience to a whole new level of fresh taste.
Ingredients You Will Need
Ten cups of fresh garden cucumbers thinly sliced into clean round coins Two cups of sweet yellow onions thinly sliced into gentle half rings One cup of red bell pepper seeded and chopped into small thin strips One cup of green bell pepper seeded and chopped into small thin strips Three tablespoons of pure canning salt or coarse non iodized sea salt Two cups of organic apple cider vinegar with five percent acidity One cup of white distilled vinegar with five percent acidity One cup of clear clean water One and a half cups of granulated sugar or natural light sweetener Two teaspoons of mustard seeds One teaspoon of celery seeds One teaspoon of whole black peppercorns Half teaspoon of ground turmeric powder Four small fresh dill sprigs or four teaspoons of dried dill weed Four cloves of fresh garlic peeled and slightly smashed
Step By Step Method
First step is selecting the best fresh cucumbers from your garden or market. Choose firm, medium sized cucumbers with smooth dark green skin and small seeds, avoiding soft spots or oversized yellowing cucumbers. Wash all your cucumbers thoroughly under cool running tap water to remove any garden dirt or debris, then dry them completely with a clean kitchen towel. Slice off both tips of each cucumber because the blossom end contains natural enzymes that can make your canned salad soft. Using a sharp kitchen knife or a handy mandoline slicer, cut the cucumbers into thin, even round coins about one eighth of an inch thick.
Second step is preparing your other fresh vegetables to build rich flavor and bright color. Slice your sweet yellow onions thinly so they match the light texture of the sliced cucumbers. Wash your red bell pepper and green bell pepper, remove the seeds and core, and slice them into delicate, thin strips. Place all your sliced cucumbers, sliced onions, and chopped colorful peppers into a large non reactive mixing bowl made of glass, stainless steel, or ceramic.
Third step is drawing out excess moisture to ensure maximum crunchiness later. Sprinkle the three tablespoons of pure canning salt evenly over the entire bowl of sliced vegetables. Toss everything gently using clean hands or wooden spoons so the salt covers every single piece evenly. Cover the large bowl with a clean cloth or plastic wrap and let it sit at cool room temperature for two full hours. During this waiting period, the salt will gently draw out extra water from the cucumber cell walls, which is the big secret to keeping them snappy after canning.
Fourth step is rinsing and draining your salted vegetables thoroughly. After two hours pass, you will notice a lot of liquid gathered at the bottom of your bowl. Pour the salted vegetables into a large colander resting in your sink to drain away all the salty water. Gently rinse the vegetables under cool running tap water for one minute to wash away excess surface salt. Let the vegetables sit in the colander for fifteen minutes, pressing down very lightly with your hands to drain away as much remaining water as possible.
Fifth step is preparing your canning equipment and sterilizing your glass jars. Place four pint sized canning jars into a large pot filled with hot water, making sure the jars are completely covered. Bring the water to a gentle boil and let the jars sterilize for ten minutes to keep them totally clean. Keep the sterilized jars in warm water until you are ready to fill them so the hot glass does not break when exposed to warm liquid. Place your new metal canning lids and ring bands in a small bowl of warm water to soften the rubber seals.
Sixth step is cooking the flavorful liquid brine that preserves your vegetables. In a medium stainless steel saucepan, combine two cups of organic apple cider vinegar, one cup of white distilled vinegar, one cup of clear water, and one and a half cups of sugar. Stir in two teaspoons of mustard seeds, one teaspoon of celery seeds, one teaspoon of whole black peppercorns, and half a teaspoon of ground turmeric powder. Place the saucepan over medium high heat and bring the liquid to a full rolling boil, stirring regularly until all the sugar crystals dissolve completely. Reduce the heat slightly and let the spiced brine simmer gently for five minutes to infuse all the wonderful herbal flavors.
Seventh step is packing the crunchy vegetables and herbs tightly into your prepared jars. Carefully remove your warm, sterilized pint jars from the hot water using clean jar tongs and set them on a wooden board or clean towel. Place one smashed garlic clove and one fresh dill sprig into the bottom of each warm jar. Using clean hands or stainless steel tongs, pack the drained cucumber, onion, and pepper mixture tightly into each jar, leaving about half an inch of space at the top.
Eighth step is pouring the hot spiced brine over your packed vegetable mixture. Carefully ladle the hot boiling brine into each jar using a wide mouth canning funnel. Make sure the liquid completely covers all the vegetable slices while maintaining a clear half inch of space at the very top of each jar rim. Insert a clean plastic bubble remover tool or chopstick down along the inside walls of the jars, gently shifting the vegetables to release any trapped air bubbles. Top off with a tiny bit more liquid if the liquid level drops after removing bubbles.
Ninth step is wiping the jar rims and securing the lids properly. Take a clean, damp paper towel and wipe the top rim of each filled glass jar thoroughly to remove any liquid drops, sugar, or spice specks that could prevent an airtight seal. Place a warm, sterile metal lid centered directly on top of each jar rim. Screw the metal ring bands down over the lids until they are finger tight, meaning you turn them until you feel firm resistance, but do not force them overly tight with full arm strength.
Tenth step is processing your filled jars in a boiling water bath preserver. Place a rack inside your large canning pot and fill it with enough water to submerge the jars under at least one inch of water. Lower your filled, sealed pint jars carefully onto the rack inside the pot, ensuring they do not bang against each other. Put the pot lid on, turn the stove burner to high heat, and bring the water to a strong, rolling boil. Once the water boils rapidly, process the pint jars for ten full minutes, adjusting for your local elevation if you live high above sea level.
Eleventh step is cooling down your finished jars safely on your counter. Turn off the stove burner after the ten minutes of boiling processing time ends, remove the pot lid, and let the jars rest inside the hot water for five minutes. Use your jar tongs to lift each jar straight up out of the pot without tilting, and place them onto a soft towel laid out on your kitchen counter. Allow the jars to sit undisturbed at cool room temperature for twenty four full hours while they cool completely. You will soon hear delightful clicking or popping sounds as the lids pull down tightly and seal shut forever.
Twelfth step is checking the final seals and storing your tasty salad. After twenty four hours, press the center of each metal lid with your finger to verify the seal. If the lid stays down flat and does not flex or pop back up, your jar is safely sealed! Wipe the outside of the jars clean, write the current date on top with a marker, and store them in a cool, dark, dry pantry. Allow the salad to sit in the pantry for at least one full week before opening so the vegetables absorb all the tangy brine flavors deeply.
Why This Recipe Is Special
This special garden recipe stands out because it solves the common problem of mushy preserved vegetables through smart culinary science. Slicing the cucumbers thin and drawing out excess water with natural salt restructures the plant tissue, allowing the slices to absorb acid while maintaining an amazing crisp bite. Using a balanced combination of apple cider vinegar and white vinegar provides a complex, fruity tartness that brightens up the natural earthy sweetness of fresh garden cucumbers and sweet onions. Bright yellow turmeric powder adds a lovely warm tone to the clear brine while offering natural anti inflammatory qualities that support bodily health. Red and green bell peppers add visual beauty to every jar, making your home food preservation look like artisanal gourmet goods bought from a high end food shop.
From a health standpoint, this slim cucumber salad is a massive win for anyone trying to eat lighter and feel energetic. Fresh cucumbers are composed mostly of clean water, making them naturally hydrating and extremely low in calories, while sweet onions contain protective antioxidants that support your immunity. Choosing to preserve vegetables with tangy vinegar rather than heavy oil based dressings keeps the calories remarkably low while delivering huge, bold taste. The spices used in this recipe, like celery seed, mustard seed, and garlic, have been celebrated for centuries for supporting digestion and cardiovascular wellness. Enjoying a small serving of this flavorful salad before or alongside your main meal helps satisfy appetite cravings and promotes better digestive balance.
Extra Tips For Better Taste
To make your crunchy garden salad taste even more amazing, use freshly picked cucumbers that were harvested early in the morning when moisture content is highest. If you do not have fresh garden dill, try adding a few whole coriander seeds or fresh grape leaves into the bottom of each jar before packing vegetables. Grape leaves contain natural tannins that actively preserve vegetable crispness, keeping your slices firm over long storage periods. You can also customize the sweetness by adjusting the natural sugar amount slightly down if you prefer a sharper, more sour pickle profile.
For people who enjoy spicy food, add half a teaspoon of crushed red pepper flakes or two thin slices of fresh jalapeno pepper into each jar. Make sure you use dedicated canning salt or coarse sea salt rather than regular table salt, as ordinary table salt contains additives that turn your clear brine cloudy. Serve your finished cucumber slim salad icy cold straight from the refrigerator for the best crisp mouthfeel during hot summer days. Try tossing a few spoonfuls of this crunchy salad over grilled chicken, pulled pork, or grain salads to instantly boost meal flavor without adding extra fat.
Final Thoughts
Canning crunchy garden cucumber slim salad is a deeply satisfying, joyful kitchen project that brings the best flavors of nature straight into your daily routine. By following these basic, clear steps, even absolute beginners can easily master home preservation and build a beautiful pantry filled with wholesome food. Opening a jar of these bright, crispy cucumbers during cold winter evenings will bring warm smiles to your dining table and remind you of sunny summer days. Enjoy sharing your delicious homemade creations with family and friends, and take pride in nourishing your body with simple, healthy, natural ingredients made right in your home kitchen.
Nutrition Details
Serving Size: Half cup of canned cucumber salad Yield: Eight pint jars total
| Nutrient Component | Amount Per Serving | Daily Value Percentage | | Total Calories | Forty five calories | Two percent | | Total Fat | Zero grams | Zero percent | | Saturated Fat | Zero grams | Zero percent | | Cholesterol | Zero milligrams | Zero percent | | Sodium | Two hundred ten milligrams | Nine percent | | Total Carbohydrates | Ten grams | Four percent | | Dietary Fiber | One gram | Four percent | | Total Sugars | Eight grams | Zero added synthetic sugar | | Protein | One gram | Two percent | | Vitamin C | Twelve milligrams | Fifteen percent | | Calcium | Twenty milligrams | Two percent | | Iron | Zero point five milligrams | Three percent | | Potassium | One hundred thirty milligrams | Three percent |
Disclaimer
Everyone’s body is different and individual health results may change depending on your personal medical history, daily diet, and overall activity level. This recipe guide is provided purely for educational and culinary entertainment purposes and should not replace professional medical advice, diagnosis, or personalized dietary planning. If you have underlying health conditions, strictly manage your daily sodium intake, or have concerns about food allergies, please consult a qualified healthcare professional or registered dietitian before making changes to your regular eating habits. Always ensure strict home food safety, proper jar sterilization, and correct acid levels when preserving food at home to maintain safe food storage practices.