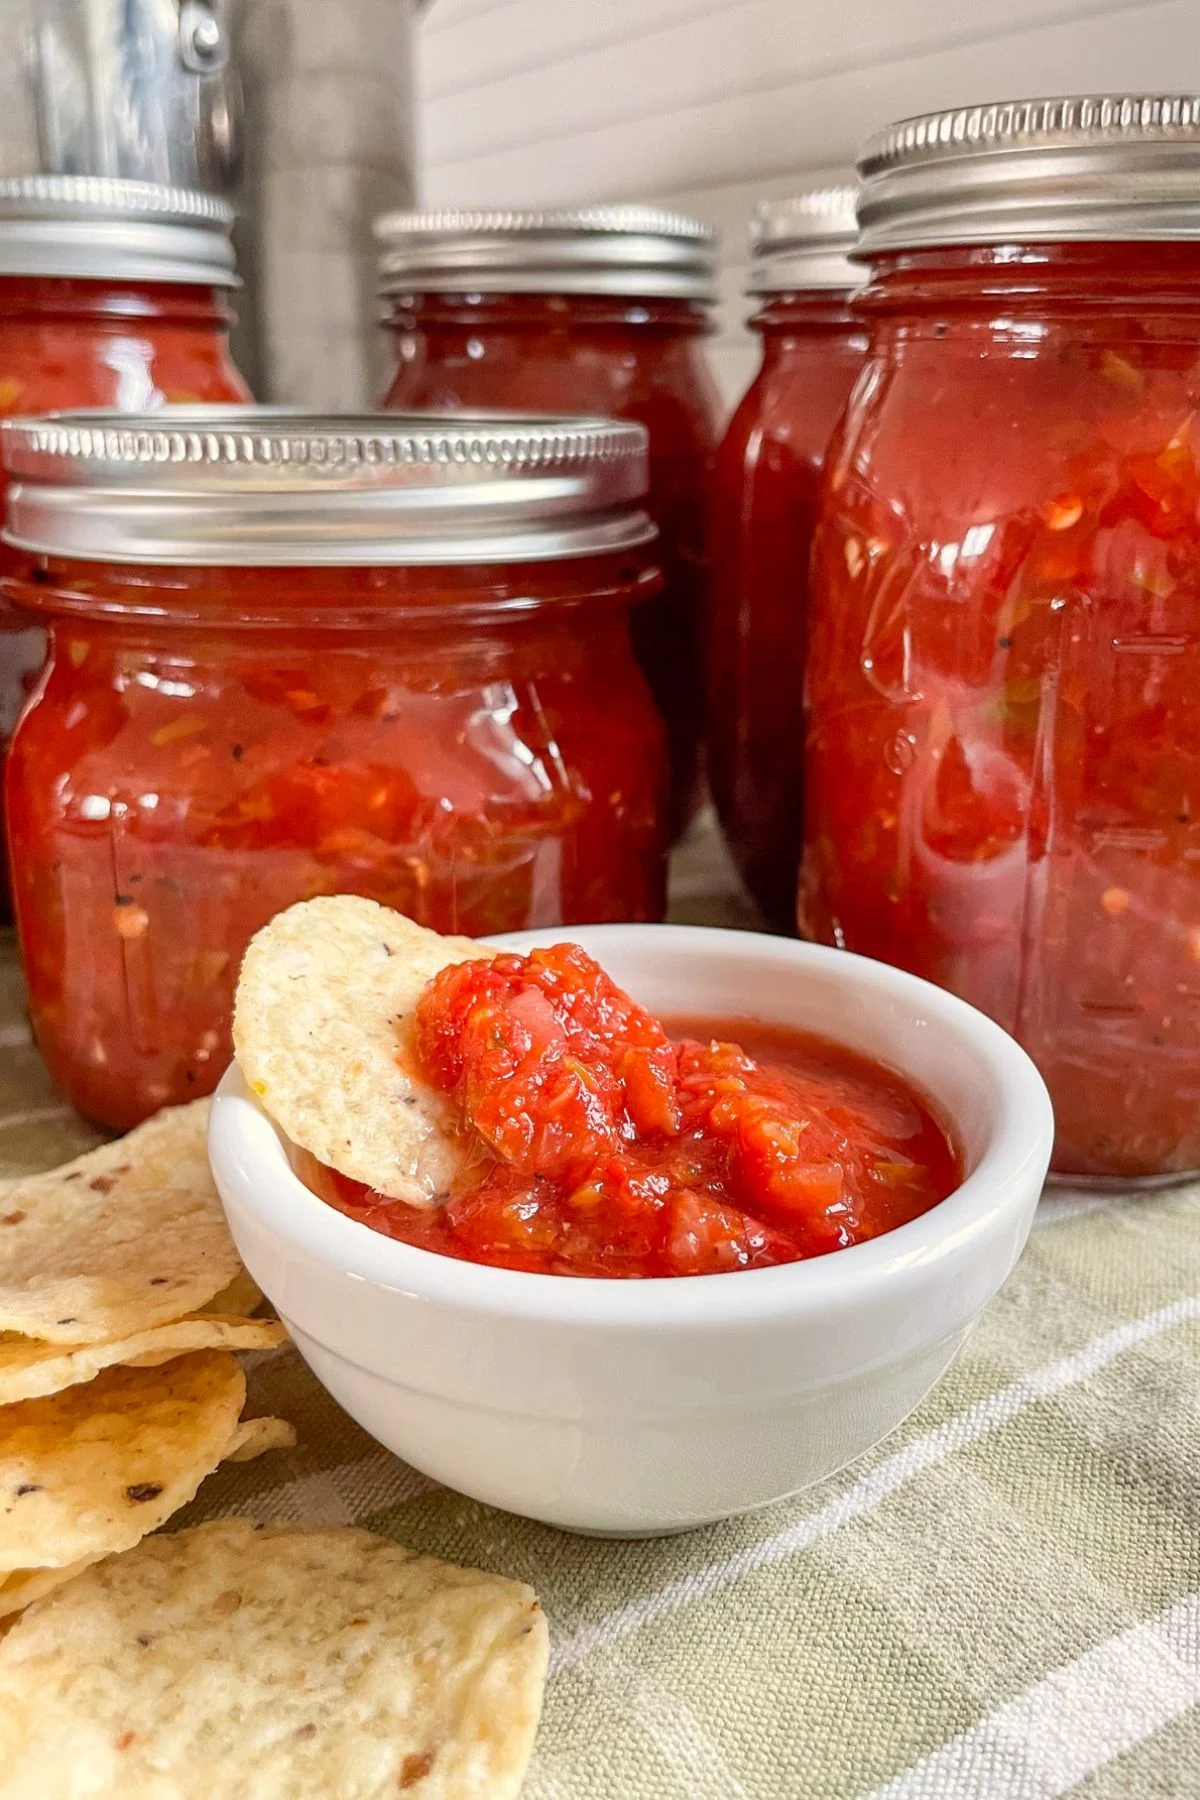
Making your own homemade canned salsa at home is one of the most rewarding cooking projects you can ever try in your kitchen. This recipe brings together fresh red tomatoes, crisp sweet onions, spicy green jalapeño peppers, aromatic garlic cloves, fragrant green cilantro leaves, and real citrus juice to create a vibrant condiment that tastes completely different from anything you can buy in a grocery store. When you open a fresh jar of this amazing preserve, you instantly smell the bright garden flavors that have been safely captured and sealed inside the glass container. Learning how to preserve this fresh vegetable sauce gives you total control over the exact ingredients you put inside your body, allowing you to avoid artificial preservatives, unnecessary chemicals, excess hidden sugars, and extra sodium that factory brands usually add to extend shelf life. It is an amazing way to preserve the golden sunshine of late summer so that your family can enjoy wholesome vegetable goodness even during the coldest winter months of the year.
People all around the world absolutely love this canned salsa recipe because it combines fantastic natural flavor with unbeatable kitchen convenience. There is a deeply satisfying feeling when you look at your pantry shelves and see rows of bright red jars filled with delicious food that you chopped and cooked with your own hands. Kids and adults alike crave the bold tang and mild kick of homemade dip during family movie nights, big game days, weekend gatherings, and quiet late night snacks. Unlike store bought jars that often taste flat, muddy, or overly processed, this version tastes remarkably fresh, crisp, and alive every single time you open a clean seal. It is also an incredibly budget friendly habit because purchasing whole fresh vegetables in bulk during harvest season costs much less than buying individual small jars from high end food markets. Friends and family always feel truly special when you hand them a beautiful hand crafted jar decorated with a simple ribbon as a loving homemade gift.
There are so many wonderful reasons and special occasions to make this batch of delicious preserved salsa today. If you grow your own vegetable garden, you know the sudden pressure of having dozens of ripe red tomatoes mature on the vines all at once during late summer, and this recipe offers the ultimate safe solution to prevent any of that gorgeous fresh produce from going to waste. From a health and fitness standpoint, this condiment is a absolute miracle worker for anyone trying to eat cleaner, manage body weight, or cut down on high calorie foods without sacrificing big flavor. Traditional snacks like creamy dips, processed salad dressings, and cheesy toppings can add hundreds of empty calories to your daily meal plan, but this vegetable packed option gives you rich moisture, bold spices, and massive crunch for almost no calories at all. Making a huge batch creates a sense of joyful comfort, turning a basic afternoon of simple kitchen preparation into a wonderful cozy routine that fills your home with rich appetizing scents.
Cooking and canning your own food at home also builds incredible self reliance and deep connection to traditional culinary skills. In our fast paced modern world where almost everything is instant, taking time to carefully wash, peel, chop, boil, and preserve wholesome ingredients grounds you and teaches you valuable traditional knowledge. You get to adjust the mild spices to match your exact personal taste preferences while learning the fascinating science of safe home food preservation through proper acid balance and boiling water bath techniques. Every time you pop open a sealed lid with that satisfying sound, you are reminded of your hard work, patience, and love for real home cooking. Whether you serve it alongside warm crispy corn chips, spoon it over grilled chicken breasts, stir it into morning scrambled eggs, or use it as a low calorie sauce for fresh taco bowls, this recipe delivers incredible joy and incredible nutrition to your table every single day.
Ingredients You Will Need
8 pounds fresh ripe red plum tomatoes or Roma tomatoes 2 pounds fresh sweet yellow onions, finely chopped 1 pound fresh green bell peppers, seeded and chopped 1 pound fresh jalapeño peppers, seeded and finely diced 10 fresh garlic cloves, peeled and minced 1 cup bottled lemon juice or bottled lime juice 1 tablespoon coarse sea salt or pure canning salt 1 tablespoon ground cumin seed powder 1 tablespoon dried oregano leaves 1 cup freshly chopped cilantro leaves 1 teaspoon black pepper ground
Step by Step Method
-
Prepare your kitchen workspace by cleaning all countertops with warm soapy water and gathering all your heavy pots, chopping boards, sharp knives, glass jars, metal bands, and flat canning lids in one clear spot.
-
Wash all the fresh plum tomatoes carefully under cool running tap water to remove any dirt or garden dust, then pat them completely dry using a clean kitchen towel.
-
Bring a very large pot of fresh clean water to a rapid rolling boil on your stove top over high heat, while simultaneously preparing a giant bowl filled with cold ice water next to the stove.
-
Carefully lower several whole tomatoes at a time into the boiling water for about thirty to sixty seconds until you notice the red skins starting to crack open slightly.
-
Quickly remove the hot tomatoes using a slotted metal spoon and submerge them directly into the ice water bath to stop the cooking process immediately.
-
Pinch the loose skins off the cooled tomatoes using your fingers, then slice the tomatoes open on a cutting board to scoop out excess watery seeds before roughly chopping the dense tomato flesh into small uniform pieces.
-
Place the chopped tomatoes into a large stainless steel stockpot that can comfortably hold all your ingredients without overflowing.
-
Chop the sweet yellow onions, green bell peppers, jalapeño peppers, and fresh garlic cloves into tiny even bits, making sure to wear protective gloves when handling the hot spicy peppers so you do not burn your skin or eyes.
-
Add the chopped onions, sweet peppers, hot jalapeños, and minced garlic into the large pot directly on top of the chopped red tomatoes.
-
Pour the exact required amount of bottled citrus juice over the vegetable mixture, making sure to use bottled juice rather than fresh squeezed juice because bottled versions have a guaranteed standardized acidity level necessary for safe home canning.
-
Measure and add the canning salt, ground cumin, dried oregano, chopped green cilantro leaves, and ground black pepper directly into the stockpot with the vegetables.
-
Stir the entire mixture thoroughly using a long wooden spoon until all the colorful ingredients, juices, and dry spices are fully distributed throughout the pot.
-
Turn the stove heat up to medium high and bring the entire salsa sauce to a gentle complete boil, stirring frequently so the bottom of the pot does not burn or stick.
-
Once the mixture reaches a solid boil, reduce the heat to medium low and let the sauce simmer gently uncovered for fifteen minutes while you stir occasionally to allow extra liquid to evaporate naturally.
-
Place your clean pint sized mason jars into a dedicated canning kettle filled with hot water, keeping them warm so they will not crack when filled with hot food later.
-
Place your flat metal lids in a small bowl of warm water to soften the rubber sealing rings around the edges.
-
Carefully remove one warm glass jar from the hot water bath using jar tongs, drain any excess water inside, and set it upright on a clean cloth folded on your kitchen counter.
-
Place a clean wide mouth funnel over the top of the warm jar and carefully ladle the hot salsa into the glass container.
-
Leave exactly one half inch of empty space at the very top of the jar between the food line and the rim, which is essential space required for proper heat expansion and vacuum sealing.
-
Slide a thin plastic spatula down along the inside walls of the filled jar to release any trapped air bubbles hidden within the chopped vegetables.
-
Wipe the top rim of the glass jar with a damp clean paper towel to remove any tiny food specks or juice drips that could prevent a tight seal.
-
Place a warm flat metal lid directly onto the clean glass rim and screw the outer metal band on until it is finger tip tight, taking care not to twist it overly hard.
-
Repeat the exact filling process for all remaining warm glass jars until all your hot vegetable sauce is safely packaged.
-
Lower the filled glass jars upright into the boiling water bath canner using your sturdy jar lifting tool, ensuring that the top of every single jar is covered by at least one full inch of boiling water.
-
Put the heavy lid on the canning kettle, bring the water back up to a full rolling boil, and process pint jars in the boiling water for fifteen full minutes.
-
Turn off the stove heat after the fifteen minute timer finishes, carefully remove the kettle lid, and let the jars sit untouched in the hot water for five extra minutes to stabilize internal pressure.
-
Use your jar lifting tool to remove each hot jar gently from the kettle, keeping them completely straight and upright without tilting them sideways.
-
Set the hot jars onto a thick dry towel spread out on your kitchen counter, leaving two inches of space between each jar so air can circulate freely around them.
-
Allow the sealed jars to cool naturally at room temperature for twelve to twenty four full hours without touching, moving, or pressing down on the hot metal lids.
-
Listen for the joyful high pitched pop sounds as the center of each metal lid pulls downward, confirming that a safe complete vacuum seal has formed inside the jar.
-
Check every seal after twenty four hours by pressing the center of each lid; if a lid feels firm and does not spring up or down, your food is safely sealed and ready to move to pantry storage.
-
Label your finished sealed jars with the exact recipe title and date using a simple marker, then store them in a cool, dark, dry cabinet where they will stay delicious for up to one full year.
Why This Recipe Is Special
This homemade canned salsa recipe stands out as truly exceptional because it delivers unmatched freshness, optimal nutrition, and wonderful security for your home food supply. By choosing every raw ingredient yourself, you guarantee that no artificial additives, chemicals, modified starches, or artificial dyes enter your family diet. Tomatoes are naturally packed with lycopene, which is a powerful antioxidant that supports heart wellness and protects body tissues. The addition of fresh garlic and colorful peppers supplies an abundance of natural vitamin C and immune supporting compounds that help keep your body strong and healthy.
Furthermore, this recipe focuses on low calorie volume eating, meaning you can enjoy generous portions on your favorite daily dishes without loading up on unwanted fats or processed carbohydrates. The high natural fiber content from fresh whole vegetables aids smooth digestion and helps keep you feeling satisfied between regular daily meals. Taste wise, the bright citrus acid perfectly balances the natural sweetness of ripe red tomatoes, while warm cumin and crushed herbs create a deep, layered flavor profile that store bought products simply cannot replicate. Knowing that you produced several long lasting jars of low fat, highly delicious vegetable food builds incredible pride and enhances your everyday eating routine.
Extra Tips for Better Taste
To elevate the overall taste profile of your canned preserve, select fully ripe plum or Roma tomatoes because they contain thick dense walls and far less watery juice than slicing tomatoes. If you prefer a smoky flavor element, consider roasting your whole garlic cloves and sweet peppers under your oven broiler or over an outdoor grill flame until the skins char slightly before chopping them into the pot. You can also mix different varieties of sweet and hot peppers like mild poblano peppers or spicy serrano peppers to create your own signature level of gentle heat.
Never reduce the total amount of bottled lemon or lime juice specified in the directions, as that exact acid balance is necessary to keep home canned foods completely safe from harmful bacteria growth over time. If you want a thicker texture without overcooking your fresh produce, drain some of the clear tomato liquid from your chopped tomatoes before adding them to your main cooking stockpot. Adding dried spices early during the simmering phase helps release their natural fragrant oils into the hot liquid, infusing every single spoonful of sauce with consistent aromatic goodness.
Final Thoughts
Embarking on the journey of canning your own delicious salsa at home is a truly delightful experience that brings immense warmth, joy, and incredible flavor straight into your family kitchen. The simple process of converting fresh raw garden vegetables into beautiful, shelf stable glass jars connects you directly to wholesome culinary traditions while providing huge benefits for your daily health and family budget. Each time you pop open a hand sealed lid to share fresh food with loved ones, you will appreciate the short time and simple care you invested in creating something real, safe, and mouthwatering. Embrace this fun cooking activity, enjoy the amazing vibrant aromas filling your home, and take proud satisfaction in knowing that you have filled your pantry shelves with nutritious homemade love.
Nutrition Details
Below is the estimated general nutritional breakdown for this homemade salsa recipe, calculated per standard serving size of two tablespoons or thirty grams of food.
Nutritional Component | Value Per Serving (2 tablespoons) Total Calories | 10 kcal Total Carbohydrates | 2.5 g Dietary Fiber | 0.7 g Sugars | 1.4 g Protein | 0.4 g Total Fat | 0.1 g Saturated Fat | 0.0 g Cholesterol | 0 mg Sodium | 120 mg Vitamin C | 12 percent daily value Vitamin A | 6 percent daily value Calcium | 8 mg Iron | 0.2 mg
Disclaimer
Please remember that every individual human body is unique, and dietary needs, digestion responses, and health outcomes vary from person to person. The nutrition estimates provided above are general approximations calculated from standard food databases and may change depending on the exact size, freshness, or specific variety of vegetables used in your kitchen. If you have specific medical conditions, severe food allergies, strict sodium limits, or unique dietary guidelines prescribed by a qualified physician, please consult your doctor or a certified registered dietitian before introducing new preserved foods into your regular eating plan. Always follow strict safe home canning practices and consult certified agricultural extension guidelines to guarantee complete home food safety.