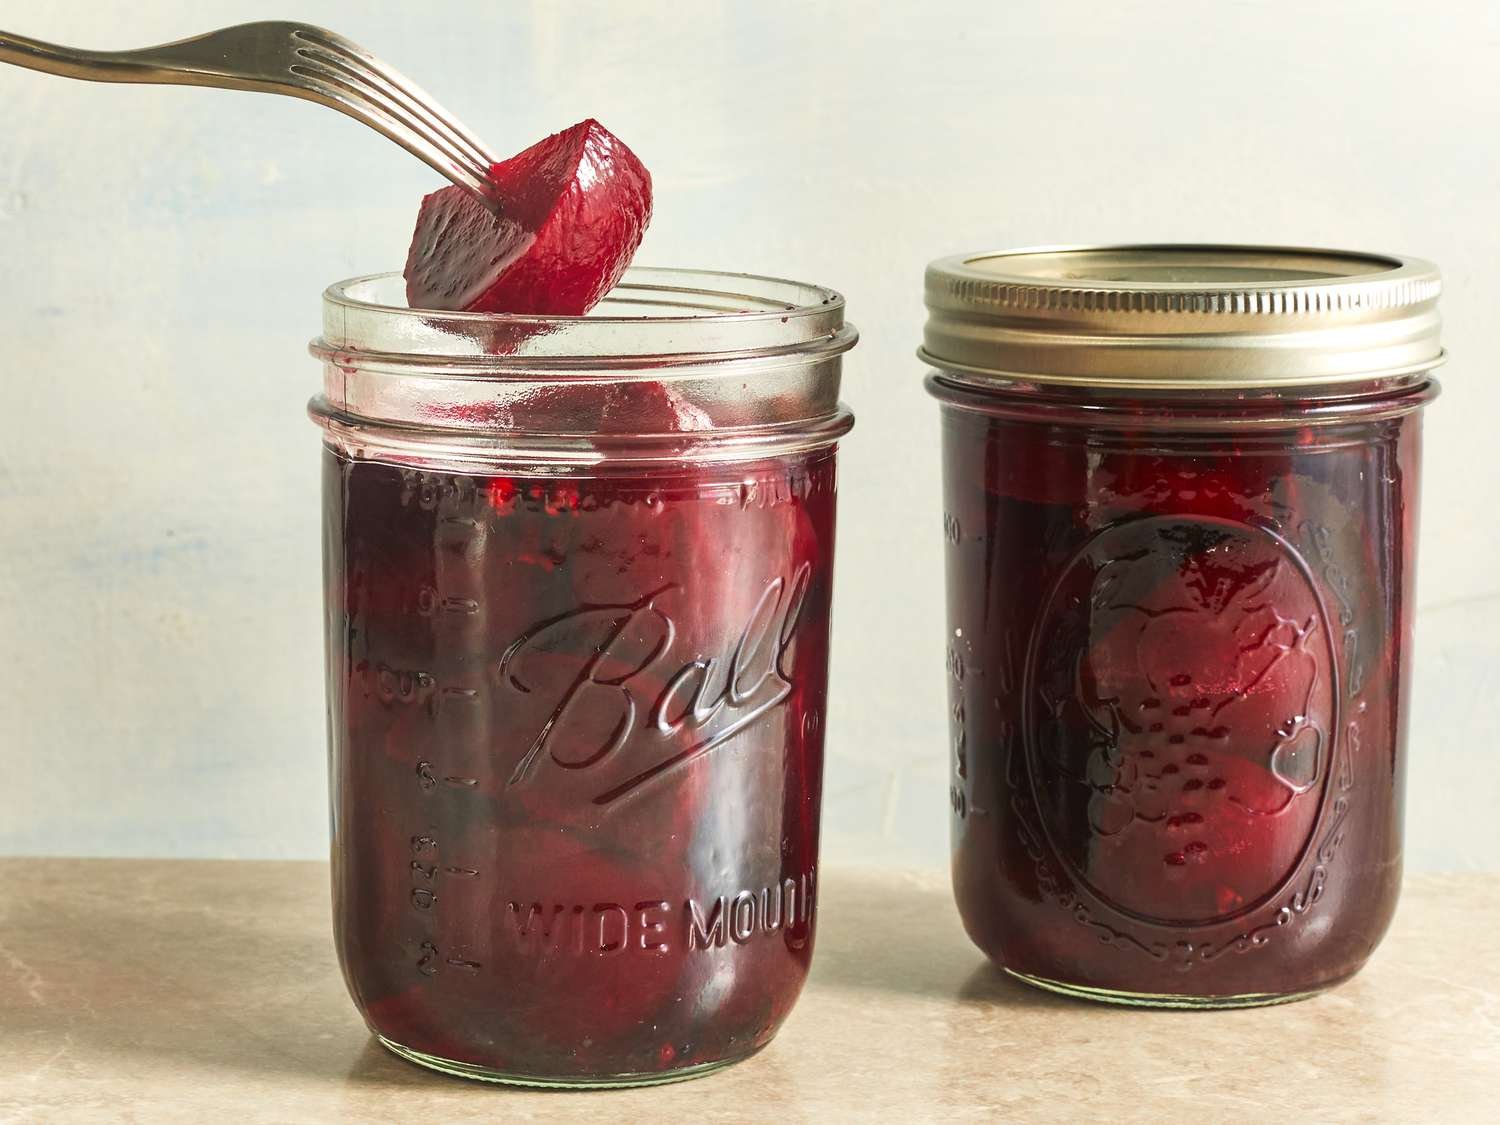
Canning pickled beets is one of the most rewarding kitchen projects you can ever try at home. This recipe brings together fresh red beets, warm aromatic spices, and a sweet tangy liquid that transforms a simple root vegetable into a jar full of rich flavor. When you make pickled beets at home, you get total control over what goes into your jar, which means no unnecessary artificial additives or strange chemical preservatives. The process of pickling allows you to preserve the bright color, the natural crunch, and the earthiness of beets for many months to come. If you have ever opened a jar of canned beets from a local farmers market, you already know how amazing they taste compared to store bought ones. This detailed guide is designed to help absolute beginners learn every single step of the process in simple words so you can feel completely comfortable making your own batch.
People absolutely love this recipe because it strikes the perfect balance between sweet and tangy flavors. The deep red color of pickled beets makes any dish look vibrant, beautiful, and delicious when served on a dinner plate. Many people have warm childhood memories of eating home canned beets made by a grandmother or a parent during the cold winter months. Beyond nostalgia, home cooks adore this recipe because it is very budget friendly and yields a large batch that can stock your pantry shelves for a long time. The satisfying snap of a well pickled beet slices cleanly under your fork and delivers a sharp burst of vinegar balanced by gentle sweet sugar notes. It is a fantastic way to turn cheap seasonal vegetables into something that tastes gourmet, fancy, and homemade.
There are so many great reasons to make pickled beets, ranging from emotional comfort to health and fitness benefits. Emotionally, the act of preserving fresh food brings a deep sense of accomplishment and connects you to traditional cooking methods. From a taste perspective, pickled beets add an instant pop of flavor to heavy winter meals, fresh green salads, sandwich spreads, and party snack platters. For fitness enthusiasts and health conscious individuals, beets are well known as a natural superfood packed with vitamins, antioxidants, and dietary fiber. Eating pickled beets gives your body a gentle boost of naturally occurring nutrients while satisfying your cravings for something tart and crunchy. Making a batch during the peak harvest season ensures you always have a quick, healthy, and colorful side dish ready in your pantry whenever you need it.
You can prepare this recipe whenever you find fresh whole beets on sale or harvest a massive batch from your backyard garden. Canning is a wonderful rainy afternoon activity that fills your kitchen with cozy spices like cinnamon, cloves, and allspice. It is also a great project to do with family members or friends who want to learn classic food preservation skills together. Having jars of homemade pickled beets stored away means you are always prepared for last minute dinner guests or quick snack cravings. They also make thoughtful, beautiful homemade gifts during the holiday season or at dinner parties. Whenever you decide to start your canning journey, this recipe will guide you through every moment so you end up with perfectly sealed, safe, and mouthwatering jars.
Ingredients You Will Need
To make this classic pickled beets recipe, gather the following ingredients in the exact quantities listed below:
- Fresh red beets: 8 pounds (medium size beets work best for consistent cooking)
- Granulated white sugar: 2 cups
- Household canning salt or non iodized salt: 1 tablespoon
- White distilled vinegar with 5 percent acidity: 2 cups
- Fresh water: 2 cups
- Whole cinnamon sticks: 2 pieces
- Whole cloves: 1 teaspoon
- Whole allspice berries: 1 teaspoon
Step by Step Method
Step 1: Preparing Your Vegetables
Start by washing your fresh red beets thoroughly under cool running tap water. Use a soft vegetable brush to remove all remaining soil, dirt, or debris from the root surfaces. When scrubbing, be gentle so you do not break or scratch the outer skin of the beets. Do not peel the beets yet, and do not chop off the roots or stems completely. Leave about 1 inch of the stem attached to the top of each beet, along with the taproot at the bottom. Leaving the skin, stems, and roots intact during the initial boil stops the deep red color and natural juices from bleeding out into the water.
Step 2: Boiling the Whole Beets
Place all your washed, whole beets into a large, deep cooking pot. Pour enough fresh water into the pot to completely cover the beets by at least 2 inches. Place the pot on your stove over medium high heat and bring the water to a rolling boil. Once boiling, reduce the heat slightly to maintain a steady simmer and cover the pot with a tight fitting lid. Let the beets cook for about 25 to 30 minutes. You can check if they are cooked by inserting a fork into a beet. The skin should feel tender, but the core should still be slightly firm so the beets do not turn mushy later.
Step 3: Cooling and Peeling
Carefully remove the hot pot from the stove. Drain the boiling water into your sink very carefully to avoid hot splashes. Immediately transfer the cooked beets into a large bowl filled with cold water and ice cubes. This process is called ice chilling, and it stops the cooking process instantly. Let the beets sit in the cold water for about 5 minutes until they are cool enough to handle safely. Pick up a beet and gently slip the skin off using your thumbs. The outer skin and stem should slide right off under light pressure without needing a knife.
Step 4: Slicing or Cutting
Place your peeled beets on a clean cutting board. Cut off and discard the top stem stub and the bottom taproot from each beet. Slice the beets into even rounds that are about one quarter inch thick. If you prefer smaller pieces, you can cut them into bite sized cubes instead. Try to keep all your slices or cubes uniform in size so they pack evenly into your jars and absorb the pickling liquid at the exact same rate. Place your cut beets into a clean, large bowl while you prepare the liquid syrup.
Step 5: Preparing the Pickling Liquid
In a medium stainless steel saucepan, combine the granulated white sugar, household canning salt, white distilled vinegar, and fresh water. Place your cinnamon sticks, whole cloves, and whole allspice berries onto a small piece of cheesecloth and tie it tightly with clean kitchen string to make a spice bag. Drop the spice bag directly into the saucepan mixture. Set the saucepan on your stove over medium heat and stir constantly until the sugar and salt are completely dissolved. Bring the mixture to a gentle boil, then lower the heat and let it simmer for 15 minutes so the warm spice flavors infuse into the liquid.
Step 6: Combining Beets and Syrup
Add your sliced beets directly into the simmering pickling liquid inside the saucepan. Bring the entire mixture back to a gentle boil over medium heat and simmer for 5 minutes. This step heats the beet slices all the way through so they are hot when packed into jars, which is essential for safe hot pack canning standards. After 5 minutes, turn off the heat and carefully remove the spice bag with tongs, throwing it away.
Step 7: Preparing Jars and Lids
While your beets are simmering, wash your glass canning jars, metal lids, and screw bands in warm soapy water. Rinse them thoroughly with clean water. Keep the jars warm by placing them in a pot of hot water or in your dishwasher on a warm cycle. Keeping your jars hot prevents them from cracking due to thermal shock when you fill them with hot liquid later. Place your lids in a bowl of warm water to soften the rubber sealing ring along the edges.
Step 8: Packing the Jars
Use clean tongs or a slotted spoon to transfer the hot sliced beets into your prepared warm jars. Pack the beets firmly into each jar, leaving about half an inch of empty space at the top of the jar. This empty space is called headspace and is crucial for creating a proper vacuum seal. After filling the jars with beet slices, carefully pour the hot pickling syrup over the beets using a clean funnel. Ensure all beet pieces are completely submerged in the liquid while maintaining that half inch headspace at the top.
Step 9: Removing Air Bubbles and Adjusting Space
Insert a non metallic tool, such as a plastic butter knife or a thin silicone spatula, down into the inside edges of each filled jar. Gently shift the beets around to release any trapped air bubbles that might be hiding between the slices. Recheck your headspace after releasing air bubbles. If the liquid level has dropped, add a little bit more hot pickling syrup to restore the correct half inch gap.
Step 10: Cleaning Rims and Applying Lids
Take a damp, clean paper towel or cloth and carefully wipe the top rim and outer threads of each glass jar. Removing any stickiness, salt, or small bits of food from the glass rim ensures that the rubber gasket on the lid can make direct, clean contact with the glass. Place a warm lid centered on top of each jar rim. Screw the metal band over the lid until it is fingertip tight. Do not overtighten the bands, because air needs to escape from inside the jar during the boiling water bath process.
Step 11: Processing in a Water Bath Canner
Lower your filled, sealed jars carefully into a hot water bath canner filled with hot water using a jar lifter tool. Make sure the water level inside the canner is at least 1 to 2 inches higher than the tops of your jars. Put the heavy lid on your canner and turn the heat up to high. Once the water reaches a vigorous, rolling boil, start your timer. Process pint jars for 30 minutes, or quart jars for 30 minutes, adjusting for your local altitude if you live far above sea level.
Step 12: Cooling and Checking the Seal
When your processing time is finished, turn off the burner and carefully remove the canner lid, tilting it away from your face to avoid hot steam. Let the jars rest inside the hot water for 5 minutes to settle down. Use your jar lifter to lift the jars straight up out of the water without tilting them. Place the hot jars onto a clean towel laid out on your kitchen counter, leaving 1 inch of space between each jar. Allow the jars to cool undisturbed at room temperature for 12 to 24 hours. As they cool, you will hear a distinct popping sound, which signals that the jars have sealed correctly. Press down on the center of each cooled lid to double check. If the center is flat and does not flex up and down, your seal is successful. Label your jars with the date and store them in a cool, dark, dry place for up to 1 year.
Why This Recipe Is Special
This pickled beets recipe stands out from other standard canning recipes because of its incredible balance of flavor, simplicity, and safety. By utilizing a proven ratio of acid to water, this recipe guarantees a safe environment that prevents bacteria growth while preserving the fresh structure of the root vegetable. The addition of subtle spices like whole cinnamon, cloves, and allspice elevates the earthy sweetness of the beets without overwhelming your palate. You get a finished product that is far superior to commercial canned options, which often taste overly metallic, dull, or excessively soft.
From a health point of view, red beets are a natural nutrient power plant. They are rich in nitrates, which help promote healthy blood flow and support natural blood pressure management inside the body. Beets are also packed with dietary fiber, folate, potassium, and essential antioxidants like betalains, which give the root its deep crimson color and help fight natural oxidative stress. Pickling beets keeps these healthy nutrients intact while extending their shelf life for months, allowing you to enjoy farm fresh nutritional benefits even during cold winter seasons when fresh local produce is hard to find.
Extra Tips for Better Taste
To make your pickled beets taste even more delicious, you can try adding a few extra simple ingredients during the preparation stage. Adding thin slices of yellow or red onion directly into the jars along with the beets creates a wonderful flavor combination that brightens up the entire mix. You can also experiment with substituting half of the white distilled vinegar with raw apple cider vinegar to bring a fruity, mellow undertone to your pickling syrup.
Another fantastic trick is adding a few whole garlic cloves or tiny strips of fresh orange peel directly into the boiling liquid while it simmers. The citrus oils from the orange peel pair beautifully with natural beet sweetness and warm cinnamon spices. If you enjoy a slight hint of heat, drop a small pinch of red pepper flakes into the liquid before filling your jars. Finally, always allow your canned pickled beets to sit on your pantry shelf for at least 2 to 3 weeks before opening the first jar, as this extra resting time allows the flavors to deepen fully.
Final Thoughts
Canning your own pickled beets is a rewarding skill that brings joy, delicious flavors, and healthy eating right into your home kitchen. With basic ingredients, simple tools, and a little bit of patience, you can turn humble garden vegetables into bright red jars of mouthwatering goodness. Whether you are preserving an abundant harvest or simply trying a fun new weekend project, this classic recipe will deliver amazing results every time. Enjoy sharing your colorful jars with family, friends, and loved ones for months to come.
Nutrition Details
Below is the calculated nutrition table for this home canned pickled beets recipe. The figures show the estimated values for the entire batch as well as per individual serving, based on a single batch yielding approximately 8 pint jars with 8 servings per pint jar.
| Nutrient Component | Value Per Batch (Total Recipe) | Value Per Serving (1/4 Cup) |
| Calories | 2150 kcal | 33 kcal |
| Total Carbohydrates | 510 grams | 8 grams |
| Dietary Fiber | 64 grams | 1 gram |
| Sugars | 430 grams | 6.7 grams |
| Protein | 32 grams | 0.5 grams |
| Total Fat | 3.2 grams | 0.05 grams |
| Saturated Fat | 0.5 grams | 0 grams |
| Sodium | 7200 milligrams | 112 milligrams |
| Potassium | 6700 milligrams | 104 milligrams |
| Vitamin C | 95 milligrams | 1.5 milligrams |
| Calcium | 320 milligrams | 5 milligrams |
| Iron | 16 milligrams | 0.25 milligrams |
Disclaimer
Everyone’s body is different, and individual dietary needs or physical reactions may change from person to person. The nutrition estimates provided in this article are calculated for informational purposes only and may vary depending on the exact size, sugar content, and variety of beets used. If you have underlying medical conditions, such as diabetes, blood pressure concerns, or specific dietary restrictions, please consult with a qualified healthcare professional or certified nutritionist before making significant changes to your daily diet.