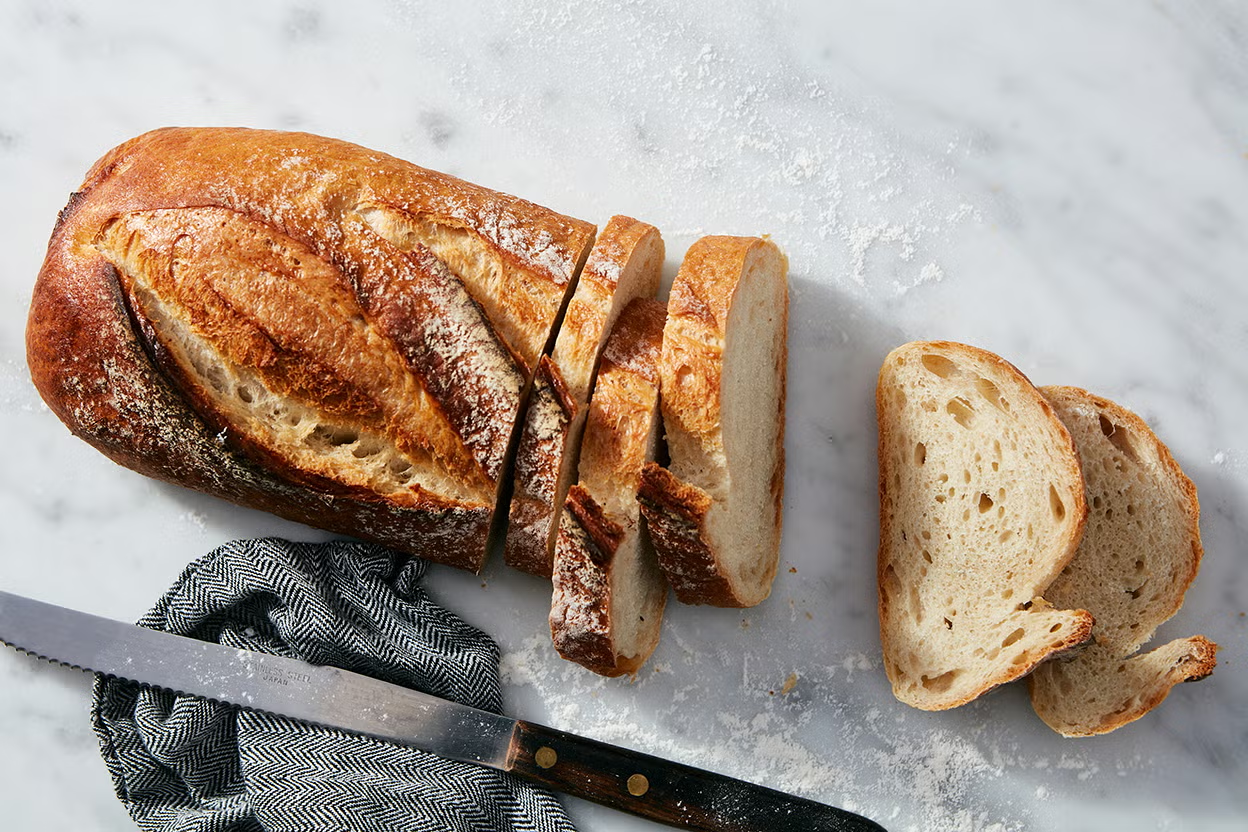
Making your own sourdough bread at home is one of the most rewarding kitchen experiences you can ever have in your whole life. There is something truly magical about taking basic kitchen items like flour, plain water, and simple salt and turning them into a delicious loaf of golden brown bread. This rustic loaf features a crackly exterior that makes a wonderful sound when cut, paired with a soft and chewy interior full of beautiful air pockets. Sourdough baking relies on natural wild yeast and friendly bacteria rather than fast commercial yeast bought from a local store. This ancient method of food preparation gives the bread its signature tangy flavor and amazing texture that mass produced store loaves can simply never match. When you slice into a freshly baked warm loaf, you feel a deep sense of pride because you created real food entirely from scratch using your own hands and patience.
Many people fall in love with homemade sourdough bread because it offers an incredible sensory experience from start to finish. The process of mixing the wet dough, stretching it gently over several hours, and watching it double in size creates a calming ritual in a busy world. The wonderful aroma of warm baking bread fills every corner of your house, making your living space feel comfortable, warm, and inviting for family and friends. Beyond the sensory joy, people adore the deep flavor profile that develops through slow natural fermentation over many hours. Every single loaf turns out slightly different, giving it a unique character and artisan charm that looks like it came from a fancy European bakery. Eating a slice topped with fresh creamy butter or sweet fruit jam brings pure happiness to any morning breakfast table.
You might wonder when is the best time to start your sourdough baking journey or why you should make this recipe today. Sourdough is wonderful for weekend cooking projects when you have extra time to relax at home and enjoy the gentle rhythm of dough preparation. It is also a fantastic choice for people who care about wellness and gut health because slow fermentation breaks down naturally occurring gluten and phytates, making the loaf much easier on your stomach. Sharing fresh warm bread with loved ones builds strong emotional connections, whether you serve it alongside a steaming bowl of rich winter soup or bring it as a thoughtful gift to a dinner party. Baking this bread satisfies your inner creator, helps you slow down from daily stress, and nourishes your body with wholesome ingredients without any artificial additives or hidden chemicals.
Learning the craft of rustic sourdough bread connects you to thousands of years of human culinary history across the world. Before modern yeast packets existed in grocery stores, every culture relied on natural fermentation to make their daily bread loaves. By mastering this classic recipe, you learn to read the subtle signs of your dough, such as how it feels under your hands, how it smells during fermentation, and how it expands during baking. This deep intuitive connection to your food brings immense personal satisfaction that fast modern convenience foods can never provide. Once you taste the deep depth of natural wild yeast flavor and feel that satisfying crunch of the dark golden crust, you will likely never want to go back to buying plain sliced white bread from the supermarket ever again.
Ingredients You Will Need
Active sourdough starter fed and bubbly, 100 grams Clean room temperature water, 350 grams Unbleached bread flour, 400 grams Whole wheat flour, 100 grams Fine sea salt, 10 grams
Step by Step Method
Step One, Preparing Your Active Starter Make sure your sourdough starter is active, healthy, and bubbly before you begin mixing your main ingredients. Feed your starter about four to six hours before starting your dough, keeping it in a warm place in your kitchen. You will know it is ready to use when it has doubled in size and shows lots of small air bubbles through the glass jar. You can test your starter by gently dropping a small spoonful into a bowl of cold water. If the starter floats easily on top of the water, it is ready for baking.
Step Two, Mixing The Water And Starter Take a large mixing bowl made of glass or ceramic and place it on your kitchen scale. Measure out your room temperature water carefully so your measurements stay accurate. Add your active starter directly into the bowl of water. Use your fingers or a silicone spatula to gently stir the starter into the water until it dissolves into a milky liquid mixture.
Step Three, Adding The Flours And Rest Period Add your unbleached bread flour and whole wheat flour into the liquid mixture inside your bowl. Stir everything together thoroughly with your hands or a wooden spoon until all dry flour disappears completely. The dough will look very shaggy, rough, and wet at this early stage. Cover the bowl with a damp clean kitchen towel or plastic wrap. Let the dough rest undisturbed on your kitchen counter for thirty minutes. This rest period is called autolyse, and it allows the flour to absorb water fully while starting natural gluten development.
Step Four, Adding The Salt After the rest period finishes, sprinkle the fine sea salt evenly across the top of your wet dough. Dimple the salt into the dough using your wet fingers, then gently fold the dough over itself several times. Keep mixing with your hands for about three minutes until the salt is completely incorporated. The dough will feel slightly firmer and smoother after the salt blends in.
Step Five, Performing Stretch And Folds Instead of traditional heavy kneading on a floured surface, sourdough relies on gentle stretch and fold movements over time. With wet hands, reach down under one side of the dough inside the bowl. Pull the dough gently upward into the air, extending it without tearing it apart. Fold this stretched section over the top center of the dough mass. Rotate your bowl ninety degrees and repeat the stretching and folding process. Continue until you have stretched all four sides of the dough. Cover the bowl and let it rest for thirty minutes. Repeat this four step stretch and fold process three more times over two hours, spacing each set thirty minutes apart. Notice how the dough becomes stronger, smoother, and more elastic with each finished set.
Step Six, Bulk Fermentation After your last set of stretch and folds is complete, cover the bowl again. Let the dough sit undisturbed at room temperature for three to five hours depending on your house temperature. Warm rooms cause faster rising, while cool rooms slow down the process. The dough is finished with bulk fermentation when it has grown by roughly fifty percent in volume, feels light and airy, shows visible bubbles on the surface, and wobbles slightly when you shake the bowl.
Step Seven, Initial Shaping Lightly dust your clean kitchen counter with a little bit of flour. Turn your dough out gently onto the surface using a plastic dough scraper. Do not flatten the air bubbles inside the dough. Use your hands to shape the dough into a smooth round ball by dragging it gently across the counter toward your body. This dragging action creates light surface tension on the outer skin of your dough ball. Let the shaped dough rest uncovered on your work counter for twenty minutes so the gluten relaxes.
Step Eight, Final Shaping Flour your hands lightly. Flip the relaxed dough upside down so the top side rests against your counter. Pull the bottom edge of the dough down slightly, then fold it up over the center. Pull the left and right sides outward, then fold them inward over the middle like an envelope. Roll the entire dough package up from the top edge downward into a tight, neat log or round shape. Pinch the side seams together securely so it holds its shape during baking.
Step Nine, Preparing The Banneton Basket Dust a round proofing basket or a medium bowl lined with a clean cotton cloth heavily with rice flour or bread flour. Rice flour works best because it prevents the wet dough from sticking to the fabric or wood. Carefully pick up your shaped dough using a scraper and place it upside down into the basket, meaning the smooth top skin faces the bottom of your basket.
Step Ten, Cold Fermentation In The Fridge Cover the proofing basket loosely with a clean plastic bag or shower cap. Place the basket into your refrigerator for twelve to sixteen hours overnight. Cold fermentation slows down yeast growth while allowing beneficial bacteria to produce lactic and acetic acids. This overnight rest builds amazing tangy flavor, strengthens dough structure, and makes the cold dough much easier to score with a knife before baking.
Step Eleven, Preheating Your Equipment Place a heavy cast iron Dutch oven with its lid inside your oven on the middle rack. Turn your oven to four hundred and seventy five degrees Fahrenheit or two hundred and forty five degrees Celsius. Allow the oven and your empty Dutch oven to heat together for at least forty five minutes to one hour so the pot becomes piping hot.
Step Twelve, Inverting And Scoring The Dough Take your chilled dough out of the refrigerator. Cut a square piece of parchment paper slightly larger than your dough basket. Place the parchment paper over the basket and quickly flip it upside down onto your counter so the dough sits safely on top of the paper. Remove the basket gently. Dust off any excess loose flour. Use a razor blade, sharp kitchen knife, or baker blade to cut a clean slit about half an inch deep along the top of the dough at a slight angle. This cut controls where the steam expands inside the oven so your bread rises upward instead of bursting at the bottom seams.
Step Thirteen, Baking With Steam Carefully remove the hot Dutch oven from your main oven using thick heat resistant oven mitts. Set the hot pot on a safe trivet. Use the parchment paper corners to lift your scored dough and lower it gently into the hot Dutch oven base. Put the hot lid securely back onto the Dutch oven. Place the pot into the oven and bake for twenty minutes with the lid on. The closed lid traps natural moisture escaping from the wet dough, creating steam that allows the crust to expand fully without burning.
Step Fourteen, Removing The Lid For Golden Crust After twenty minutes pass, carefully remove the lid from your Dutch oven. Lower your oven temperature to four hundred and fifty degrees Fahrenheit or two hundred and thirty degrees Celsius. Continue baking the bread uncovered for another twenty to twenty five minutes. Watch the crust turn from pale yellow to a deep, beautiful reddish golden brown color with dark rustic blisters.
Step Fifteen, Cooling The Loaf Completely Remove the hot Dutch oven from your main oven. Carefully lift your baked sourdough bread out of the pot using the parchment paper edges and place it on a wire cooling rack. Listen closely for a crackling sound as the hot crust cools down in the air. Let the bread cool completely at room temperature for at least two to three hours before slicing. Slicing warm sourdough bread while steam is trapped inside makes the interior gummy and dense. Waiting allows the crumb structure to set properly for optimal texture.
Why This Recipe Is Special
This sourdough recipe shines because it uses natural fermentation without commercial additives, artificial preservers, or excess refined sugars. Traditional factory bread contains extra ingredients designed to extend shelf life, but this rustic loaf stays fresh naturally through low pH acid levels created by wild sourdough bacteria. The long fermentation breaks down complex starches into simple sugars, making it far easier to digest for people with mild sensitivity to grain products.
From a nutrition standpoint, natural sourdough provides higher bioavailable nutrients than unfermented breads. Phytic acid found in whole grains usually binds to minerals like iron, zinc, and magnesium, blocking your body from absorbing them efficiently. The natural acidity created during slow fermentation neutralizes phytic acid, allowing your digestive system to absorb beneficial minerals easily. Additionally, sourdough acts as a prebiotic food source, feeding the good bacteria in your gut biome to support overall digestive health and immunity.
The taste profile of this handmade loaf is far superior to standard commercial options. The combination of bread flour and whole wheat creates a pleasant nutty note paired with a mild, clean sour tang. The crisp crust offers a delightful crunch with every bite, contrasting beautifully with the soft, chewy interior crumb. Each bite provides complex flavor notes that linger on your palate, making even a simple slice of toasted bread feel like a gourmet dining experience.
Extra Tips For Better Taste
Use high quality unbleached flours when building your dough because chemical bleaching agents weaken gluten networks and destroy natural micro flora. Adding a small proportion of rye flour or stone ground whole wheat flour to your sourdough starter brings deeper earthy notes and speeds up natural yeast activity significantly.
Always use room temperature or slightly warm filtered water if your tap water contains heavy chlorine smells. Chlorine kills delicate wild yeast strains and beneficial lactic bacteria, resulting in a sluggish rise and flat bread shape. Filtered water allows your natural micro organisms to thrive without chemical resistance.
Create extra steam inside your Dutch oven by placing one or two small ice cubes under the parchment paper just before closing the hot lid. The ice melts rapidly, generating extra moisture that helps the dough expand even higher while producing a glossy, blistered crust with incredible crunch.
If you enjoy a stronger sour flavor profile, extend the cold fermentation time in your refrigerator up to twenty four hours. The cool temperature stops yeast activity almost completely while allowing lactic and acetic acid bacteria to keep producing rich sour compounds slowly.
Final Thoughts
Baking rustic sourdough bread at home is a journey of patience, learning, and immense daily satisfaction. Do not feel discouraged if your very first loaf turns out slightly flat or uneven, because every single attempt teaches you valuable lessons about temperature, timing, and dough handling. As you practice this ancient craft, you will develop a comfortable kitchen rhythm and intuitive feel for the dough. Before long, pulling a golden, crackly, aromatic sourdough loaf from your warm oven will become a natural and cherished habit in your weekly home routine. Enjoy sharing your delicious homemade creations with family and friends, and celebrate the simple joy of wholesome homemade food.
Nutrition Details
Here is the nutrient breakdown for this rustic sourdough recipe.
Nutrition Summary Table
Servings per recipe, 10 slices Serving size, 1 slice approximately 85 grams Preparation time, 24 hours including long fermentation Baking time, 45 minutes
Nutritional Values Per Single Serving
Calories, 185 kcal Total Fat, 1 gram Saturated Fat, 0.2 grams Sodium, 390 milligrams Total Carbohydrates, 37 grams Dietary Fiber, 3 grams Sugars, 0.5 grams Protein, 7 grams Iron, 2 milligrams Calcium, 12 milligrams Potassium, 95 milligrams
Disclaimer
Please note that dietary needs and health conditions vary from person to person. While slow natural fermentation reduces phytic acid and changes gluten structures, this bread still contains natural wheat gluten and is not suitable for individuals with celiac disease or severe wheat allergies. Nutritional values provided in this article are estimates based on standard ingredients and may vary slightly depending on the specific brands, flours, and slice sizes you use at home. Always consult a qualified healthcare professional or dietitian regarding personal dietary changes or medical health concerns.